Ayla Dynamic Linking in Emails
This feature provides your end users with a seamless experience from activating their accounts to using their connected devices.
With Dynamic Linking in Emails, your end users receive hyperlinks in their confirmation email to navigate either directly to the page you choose in your Ayla-enabled app if they have it installed, or to the appropriate app store to install the app. This feature also includes a quick-and-easy option to provide your company branding in the emails.
This feature guide explains Ayla's Dynamic Linking in Emails, including how to configure and modify it.
Configuring Dynamic Linking in Emails
Initial Setup in the Firebase Console
To get started, you (as an App Developer) need to create a project and register your app(s) on Google's Firebase console. This part of the setup is essential in creating the dynamic links that are used in the Ayla confirmation email. Before navigating to the Firebase console, obtain the following iOS and/or Android application identifier for the registration process:
- For iOS, this is the iOS Bundle Identifier (often called bundle ID). The bundle ID uniquely identifies an application in Apple's ecosystem and is found in the Xcode of your iOS project on the General tab of the top-level app. The value is formatted like this: com.yourcompany.yourproject
- For Android, this is the Application Package Name (APN). It uniquely identifies your app on the Android device and in the Google Play Store. The APN is found in the module (app-level) Gradle file (app/build.gradle) and is formatted like this: com.yourcompany.yourproject
Click here to navigate to the Firebase console and complete the following steps: (Refer also to the example below.)
- Create a Firebase project for your Ayla-enabled app(s).
- Click your project to open the "Get Started ..." page from which you navigate to the registration.
- Click either the iOS or Android icon, and then complete the registration steps.

Once you have registered your app(s), you must download the GoogleService-Info.plist (or the google-services.json) config file for Android and iOS to begin the configuration in the Ayla Customer Dashboard. To do this, follow the instructions on the Firebase console. Refer to the following example:

Left side: Shows the next steps after registering the app
Right side: Shows the setup completed for the Ayla-enabled app & where to download the config file
At this time, Dynamic Linking in Emails is available for Ayla's FastTrack app. Click here for more information on "Setting up a Firebase project and registering apps" on Google's Firebase console.
Following is an example of the information provided in the GoogleService-Info file, some of which is integrated with Ayla-provided information to complete your configuration of the dynamic links that will be included in the confirmation email for your Ayla-enabled app:

- apn - The package name of the Android app to use for the link. The app must be connected to your project from the Overview page of the Firebase console. This is required for the dynamic link to open the Android app.
- ibi - The bundle ID of the iOS app to use for the link. The app must be connected to your project from the Overview page of the Firebase console. This is required for the dynamic link to open the iOS app.
- api_key - This is the Firebase API key. It is a Firebase authorization feature, which the Ayla Platform uses to verify that the Firebase project is registered.
- url_prefix - This is the dynamic link created on the Firebase console. The Ayla Platform uses the url_prefix to re-create the URL that specifies which app screen the end user is directed to upon clicking the dynamic links in the confirmation email.
- app_id - This ID is automatically generated upon completing your initial configuration on the Firebase console.
- oem_id This ID is automatically generated upon completing your initial configuration on the Firebase console.
Final Setup in the Ayla Customer Dashboard
With the information from the Firebase console in hand, you log in to the Ayla Customer Dashboard and navigate to the Firebase Config tab in the OEM Profile (shown in the example below). From this tab, you complete your configuration of the dynamic links that will be included in your end user's confirmation email. This also creates a unique experience for your Ayla-enabled app.

On the Firebase Config tab, you click the CREATE NEW button to open the dialog box where you enter your settings (shown below).
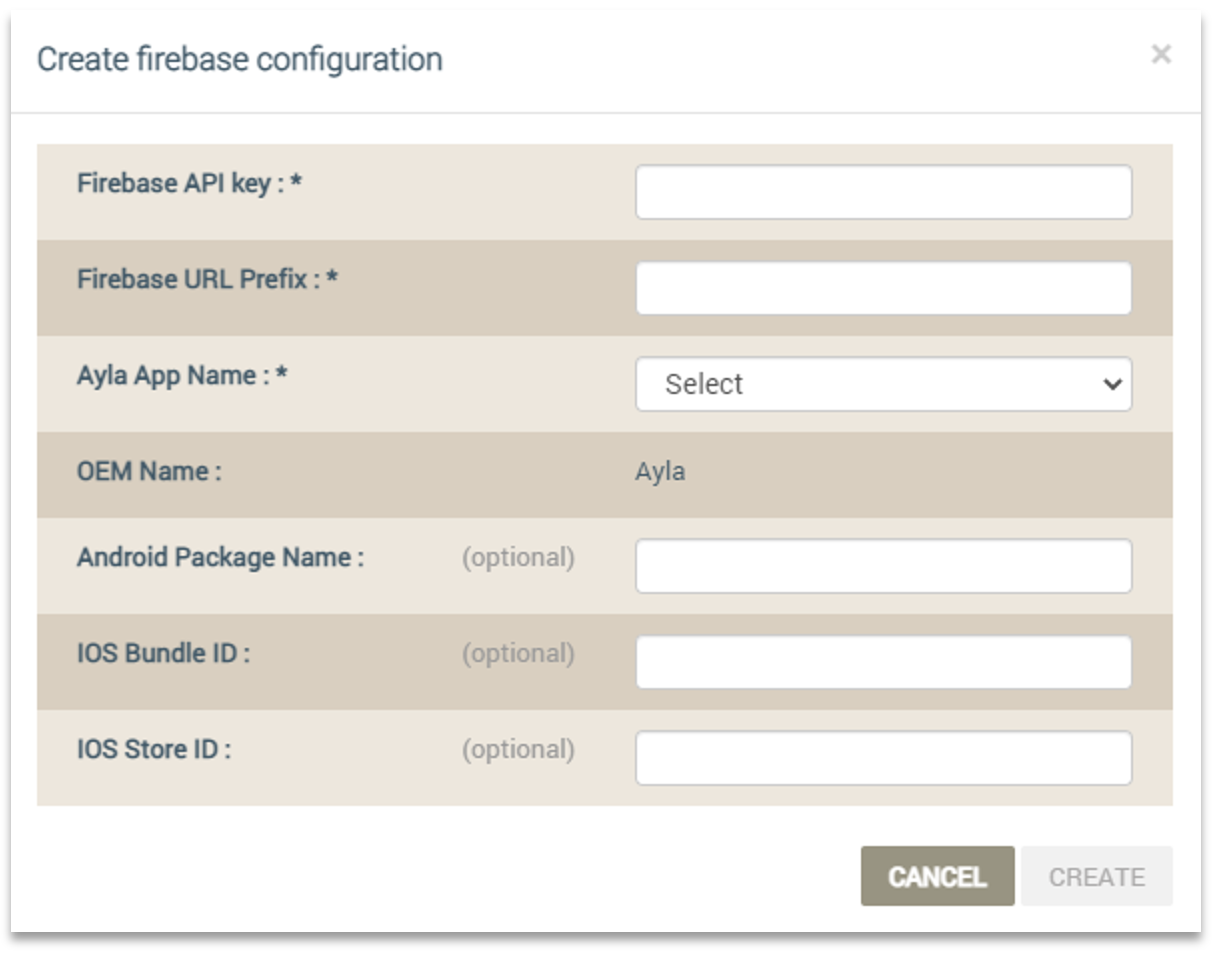
- Firebase API key - This is provided in the GoogleService-Info.plist (or the google-services.json) config file that you downloaded from the Firebase console. (Refer to the previous section.)
- Firebase URL Prefix - This is also provided in the GoogleService-Info.plist (or the google-services.json) config file.
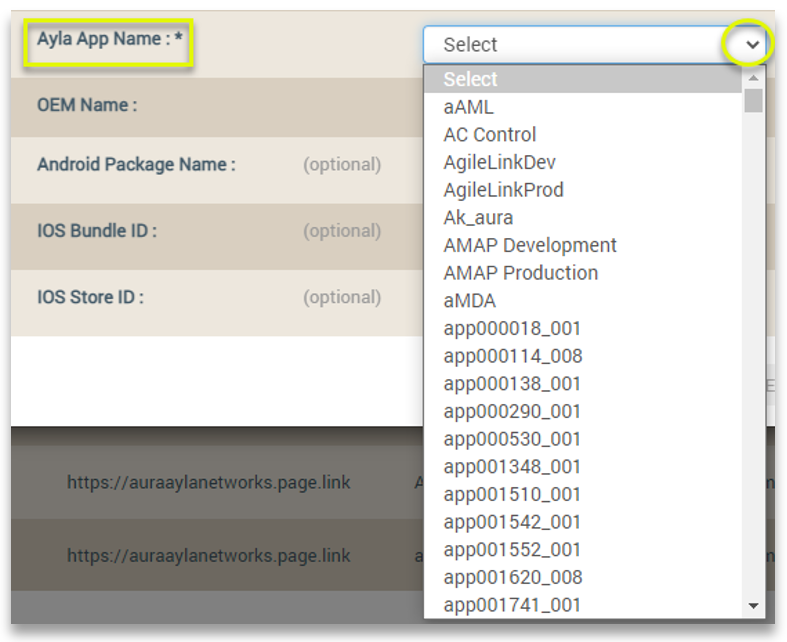
- Ayla App Name - This is the Ayla App ID that is provided when you register your mobile app with Ayla. As shown below, this field is a drop-down list that includes all the App IDs associated with your OEM profile in the Ayla Platform.
- OEM Name - This is your OEM ID assigned when you first created your Ayla OEM account.
- Android Package Name - This is the APN provided in the GoogleService-Info.plist (or the google-services.json) config file. Please refer to the definition of the APN in the previous section.
- iOS Bundle ID - This is the IBI provided in the GoogleService-Info.plist (or the google-services.json) config file. Please refer to the definition of the IBI in the previous section.
- iOS Store ID: This is called "isi" in the GoogleService-Info.plist (or the google-services.json) config file. The mobile app developer creates this ID when registering the Ayla-enabled app in the Apple App store. This is also entered when you complete your initial setup on the Firebase console and then provided in the GoogleService-Info.plist (or the google-services.json) config file.
When you click CREATE, your Dynamic Linking in Emails for that particular app is complete, and the entry for your configuration is added to the Firebase Config tab, as shown below.

If you wish to view the dynamic link in your confirmation email templates, you can download your confirmation email template from the Message Templates tab as follows:
- Click the Message Templates tab in the OEM Profile.
- Use the Search tool to find your confirmation email template.
- Click the Download icon to download your template.
Refer to the following example:

The email template downloads as a compressed file. In this file, extract and open the template.html file in an application that enables you to view the HTML code. Then, search for "Firebase Dynamic Link" in the file, as shown in the following example:

Following is an example of a Welcome email with dynamic links, which was sent when the end user registered for the Ayla FastTrack app:

In this example above, upon clicking the dynamic link in this Welcome email, the end user is directed to the screen in the Ayla-enabled app that was specified when configuring Dynamic Linking in Emails.
Configuring Your Company Branding for the Email
As part of Ayla's Dynamic Linking in Emails, you can showcase a branded output in the confirmation emails to your end users.
To configure your branding, you upload your company logo to your profile in the Ayla Customer Dashboard. Once you have logged in to the dashboard, navigate to the the Profile tab and click the EDIT button. Refer to the following example:

When you click EDIT, the UPLOAD button displays in the Company Logo field, as shown below:

After navigating to your logo file and uploading it, a PREVIEW link displays in the Company Logo field. Click this link to view your logo that will be included in your emails for your Ayla-enabled app. Refer to the following example:

Notice also the trashcan icon in the example above. You can click this icon to delete the logo, enabling you to upload a new one. Click the UPDATE button to complete this configuration.
Changing/Managing Your Configurations
Using the Firebase Config tab in the Ayla Customer Dashboard, you can change the settings in your configuration or delete the entire configuration for Dynamic Linking in Emails.
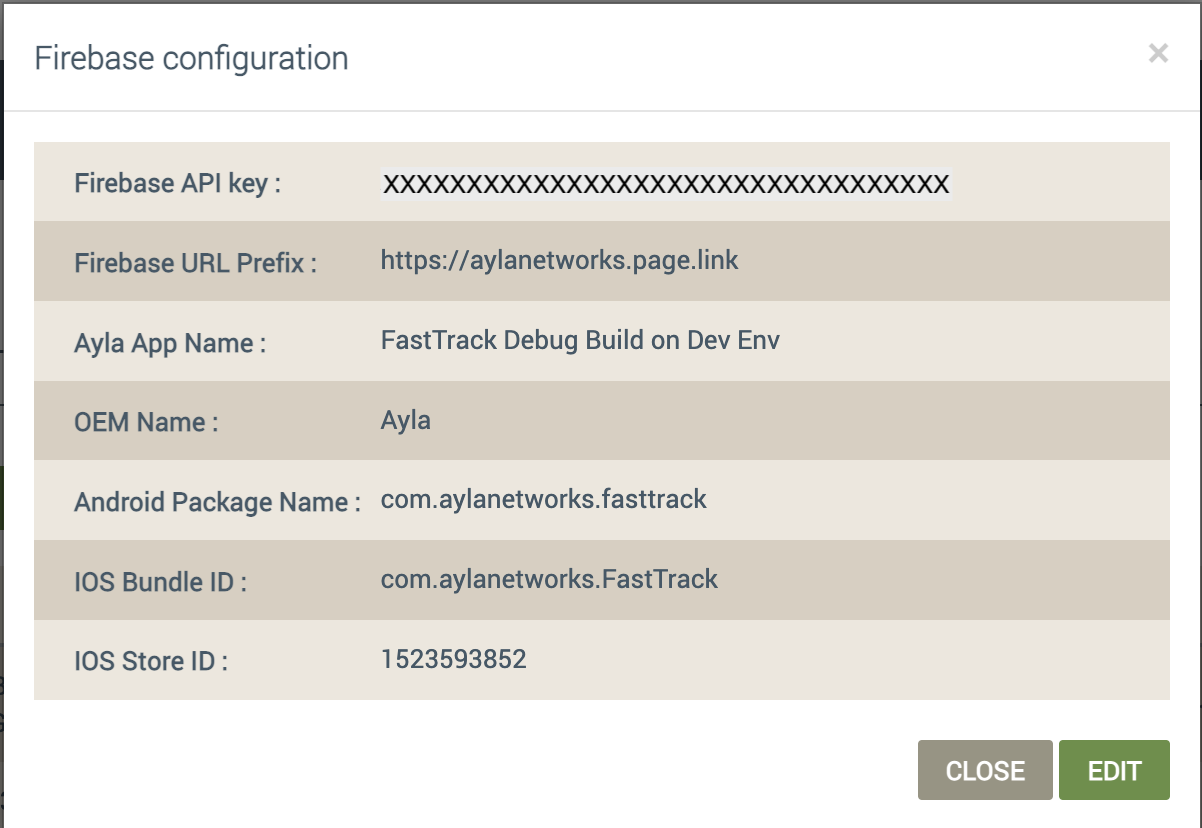
To change the settings, click the configuration listed on the Firebase Config tab to open the Firebase Configuration dialog box, as shown in the following example:
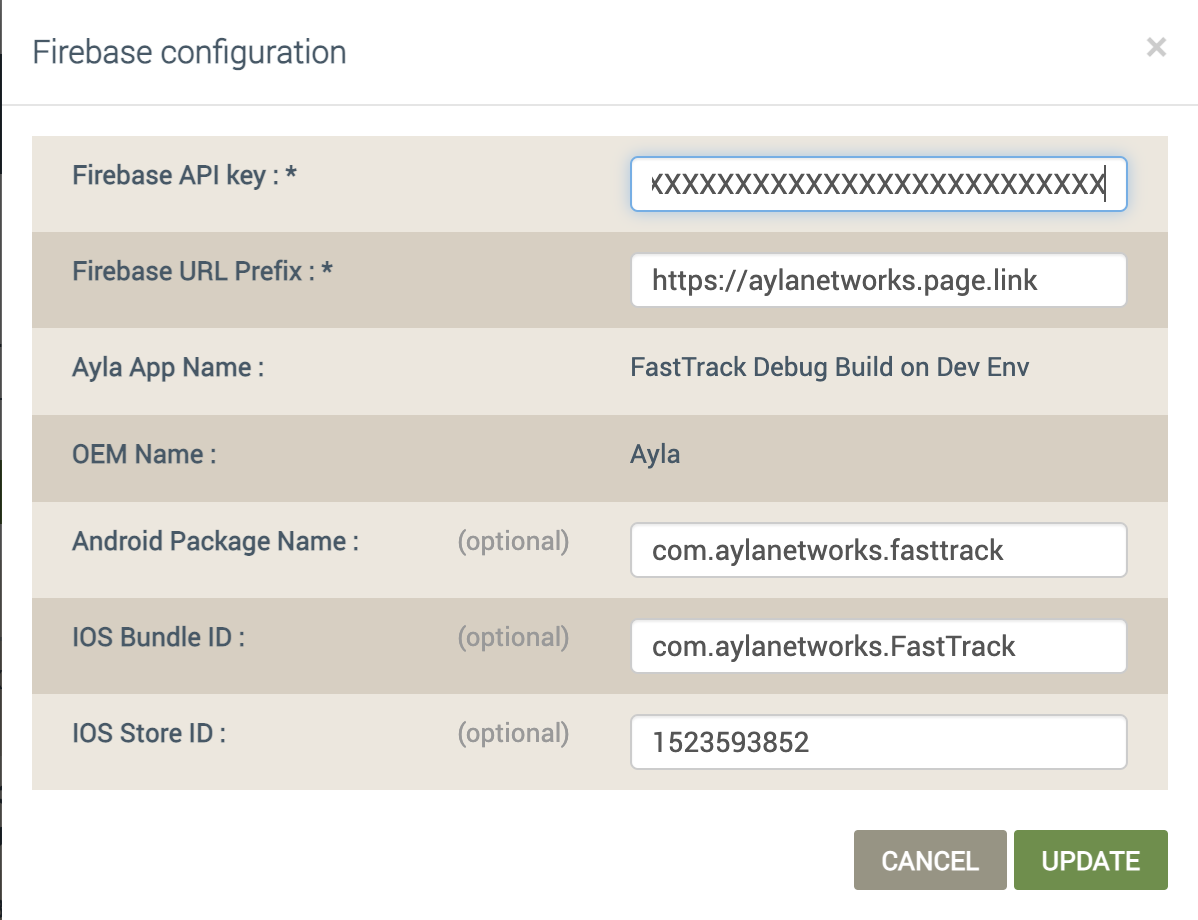
Click the EDIT button in the dialog box to change the settings. Then, click the UPDATE button to save your changes. Refer to the following example:
To delete the configuration, click the trashcan icon at the end of the entry on the Firebase Config tab. Refer to the following example:
