Job Schedules
The Command Center provides the ability to create schedules for straightforward to complex deployments of Over-the-Air (OTA) updates. Schedules enable you to minutely control the execution of all job types. By configuring a schedule, you can control the active dates, day, and execution time ranges of your job. This feature also eliminates the need for any user interaction to start and stop jobs. Once you have configured your schedule, you can rely on the complete delivery of your OTA update to the devices specified in your job.
This section of the Command Center features guide explains schedules, including configuration details and common use cases.
Configuring Schedules
In the Command Center, you can create schedules that range from a straightforward OTA delivery with a start and stop date/time to a delivery that requires a precise timeframe over a specific period of time, such as an OTA update between 2 AM and 6 AM for 5 months.
You also have the option to configure the schedule while you are creating the job or at a later time as long as you have not started the job. Following are these two configuration options:
- In the step-by-step workflow for creating all job types.
- As part of the editing workflow from the Jobs tab.
Add the Schedule While Creating a Job
When creating a Command Center job, you can configure a schedule in Step 4 of the step-by-step workflow, as shown in the example below. Also notice in the example that you can hover your cursor over the question-mark icons to display tool tips for details on any of the fields.
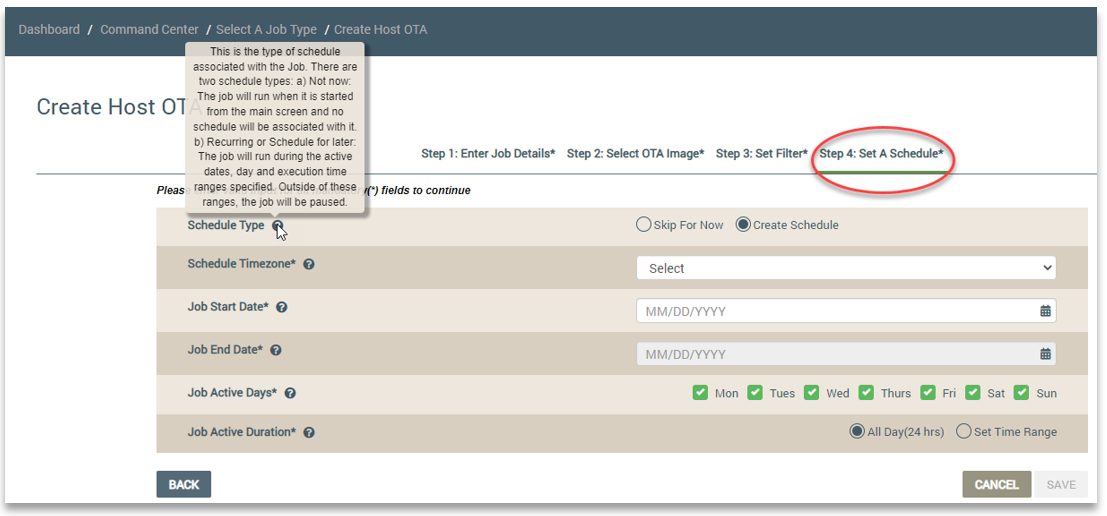
Following are descriptions of the fields:
- Schedule Type - Select Skip for Now if you do not want to associate a schedule with the job or wish to add a schedule at a later time. Select Create Schedule to configure the schedule. When you click the latter, all of the fields for configuring the schedule display.
- Schedule Timezone - Select the timezone for the job schedule in the drop-down list. [Ajit: Let's mention that currently we support only UTC]
- Job Start Time - Select a date to specify when to start the job.
- Job End Date - Select a date to specify when to stop the job.
- Job Active Days - Select the checkboxes for the days that the job should be active. The job is paused on all other days.
- Job Active Duration - Select All Day (24 hrs) if the job should run for the entire day that you specified as active. Select Set Time Range if you wish to set a specific time range that the job should run on active days.
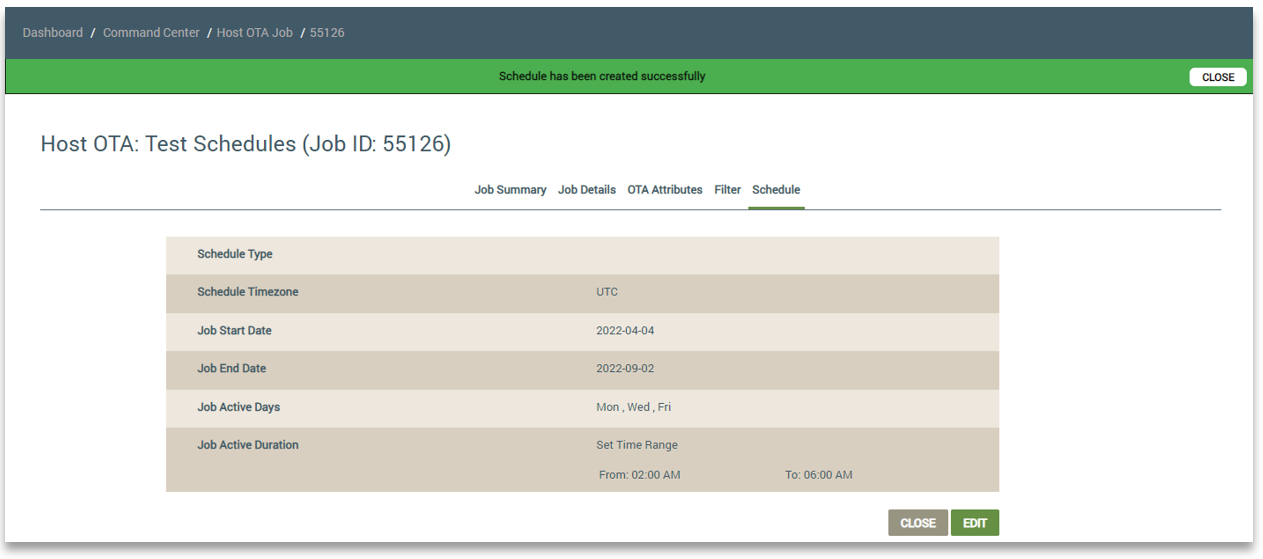
Click SAVE to complete the configuration of your schedule. The job is then added to the Jobs tab and a banner displays across the top of the page to confirm that you have successfully created a schedule for the job, as shown in the example below.

Add the Schedule When Editing a Job
If you have not started your job, you can create a schedule from the Jobs tab whenever you are ready. This gives you time to plan any details that may affect the final schedule. To add a schedule at a later time: (Please also refer to the example below.)
- On the Jobs tab, click the job entry to open the Job Summary.
- Click the Schedule tab.
- Click the EDIT button.
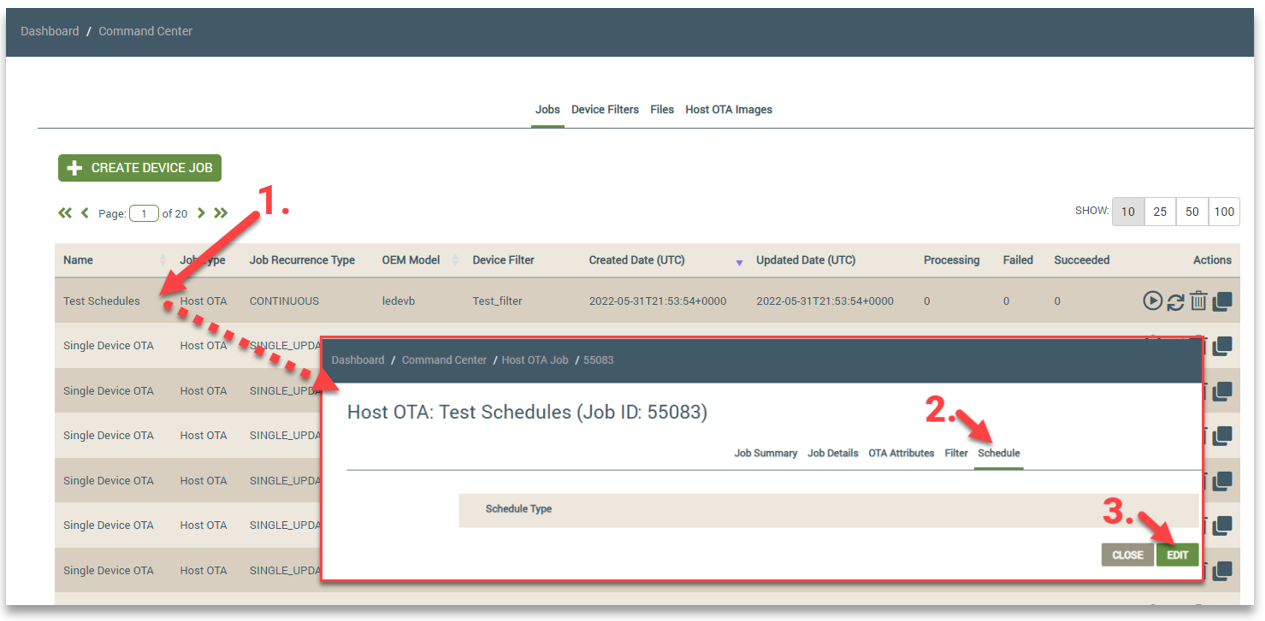
Click the Create Schedule option to display the fields (shown in the example below). Notice also that you can hover your cursor over the question-mark icons to display tool tips for details on any of the fields.
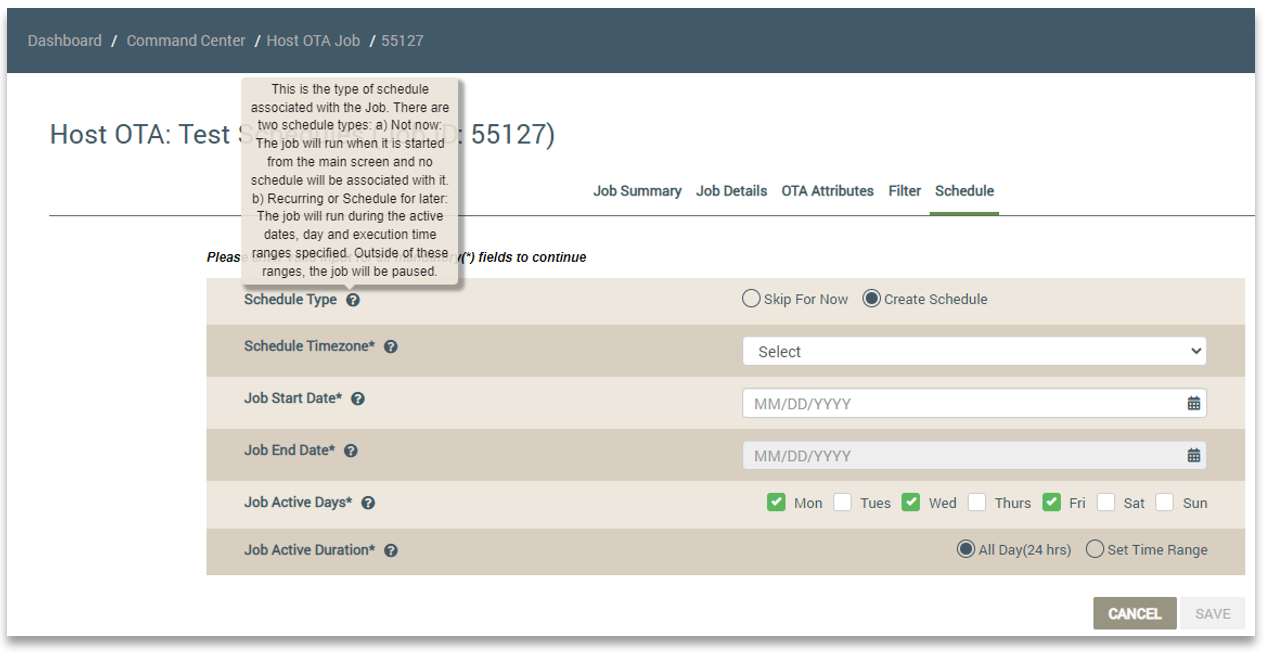
Refer to the previous section for a description of the fields. Click SAVE to complete the configuration of your schedule. A banner displays across the top of the page when you have successfully created a schedule for your job. Refer to the following example:
Editing Existing Schedules
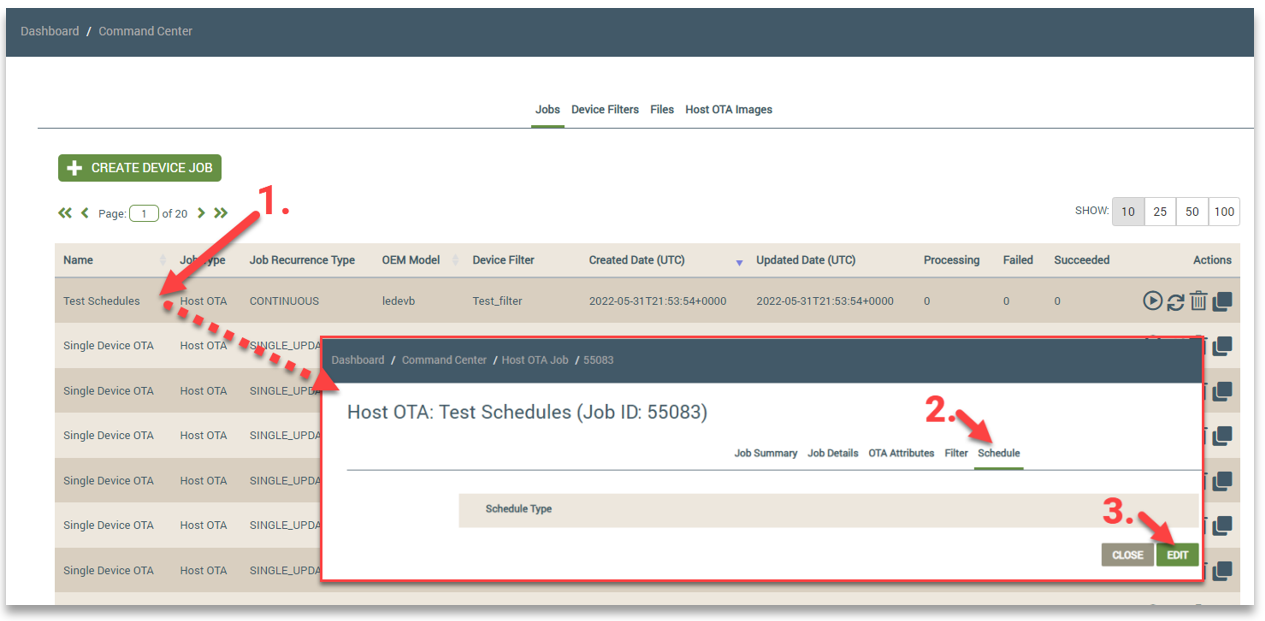
If you have not started your job, you can make changes to its schedule as follows: (Refer also to the example below.)
- Click the job entry to open the Job Summary tab.
- Click the Schedule tab.
- Click EDIT to make changes.
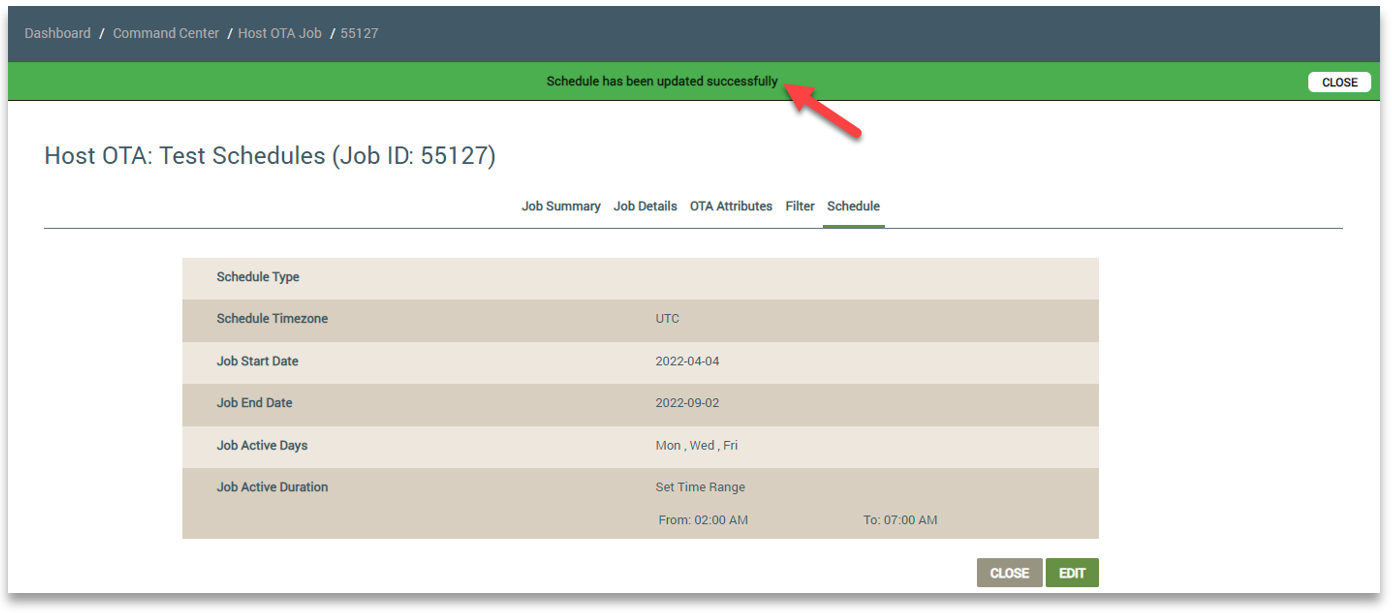
Once you have made your changes, click the SAVE button. A banner displays across the top of the page to confirm that the update was successful. Refer to the following example:
Common Use Cases for Schedules
A common use case for schedules is the flexibility to deliver your OTA update at a time that is most beneficial for your end users. For example, if your device is a coffee maker:
- You may choose to schedule a software update when most end users are asleep or not making coffee, such as 1 AM - 4 AM.
- You may want to offer end users the option to download a "winter coffee brew" recipe during the winter months only, such as December 21 to March 20 from 5 AM to 10 PM daily.
Another common use case is the ability to create a schedule for a planned OTA update, instead of having to start and stop the job manually. For example, if you were planning to roll out a software upgrade from 12 AM to 6 AM on Friday and Saturday, you could create this schedule in advance. Having a schedule in this scenario saves you and your team the time and effort required to control the upgrade manually over the weekend.
Updated 7 months ago
