How to create Push notifications PEM file
iOS Push Notifications allow apps to receive updates, alerts, or other messages from a server, even when the app is not running. The notifications can be delivered to the user's device and appear as badges, sounds, or alerts. Below is a comprehensive guide on the process of implementing iOS Push Notifications, from configuring your app to sending notifications.
Prerequisite
-
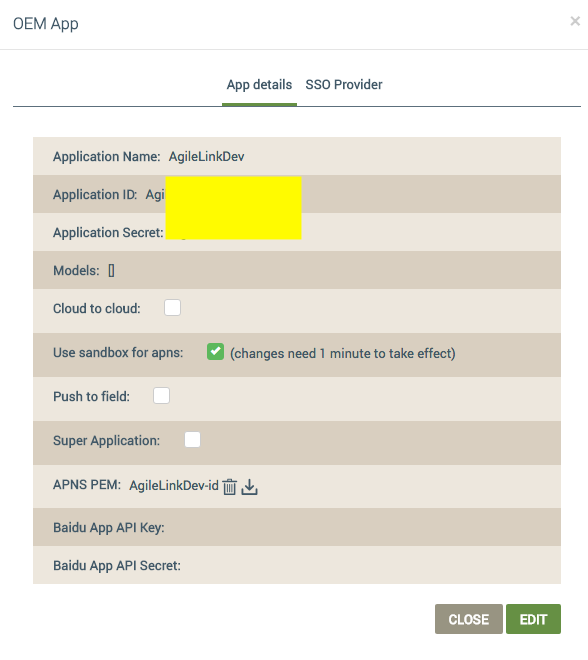
For Development purpose (compiled through Xcode), in Ayla Developer Dashboard, select the Use sandbox for apns option, and upload Apple Development PEM file.
-
For Production purpose (TestFlight/Hocky App Release), in Ayla Developer Dashboard, clear the Use sandbox for apns option, and upload Apple Production PEM file.
-
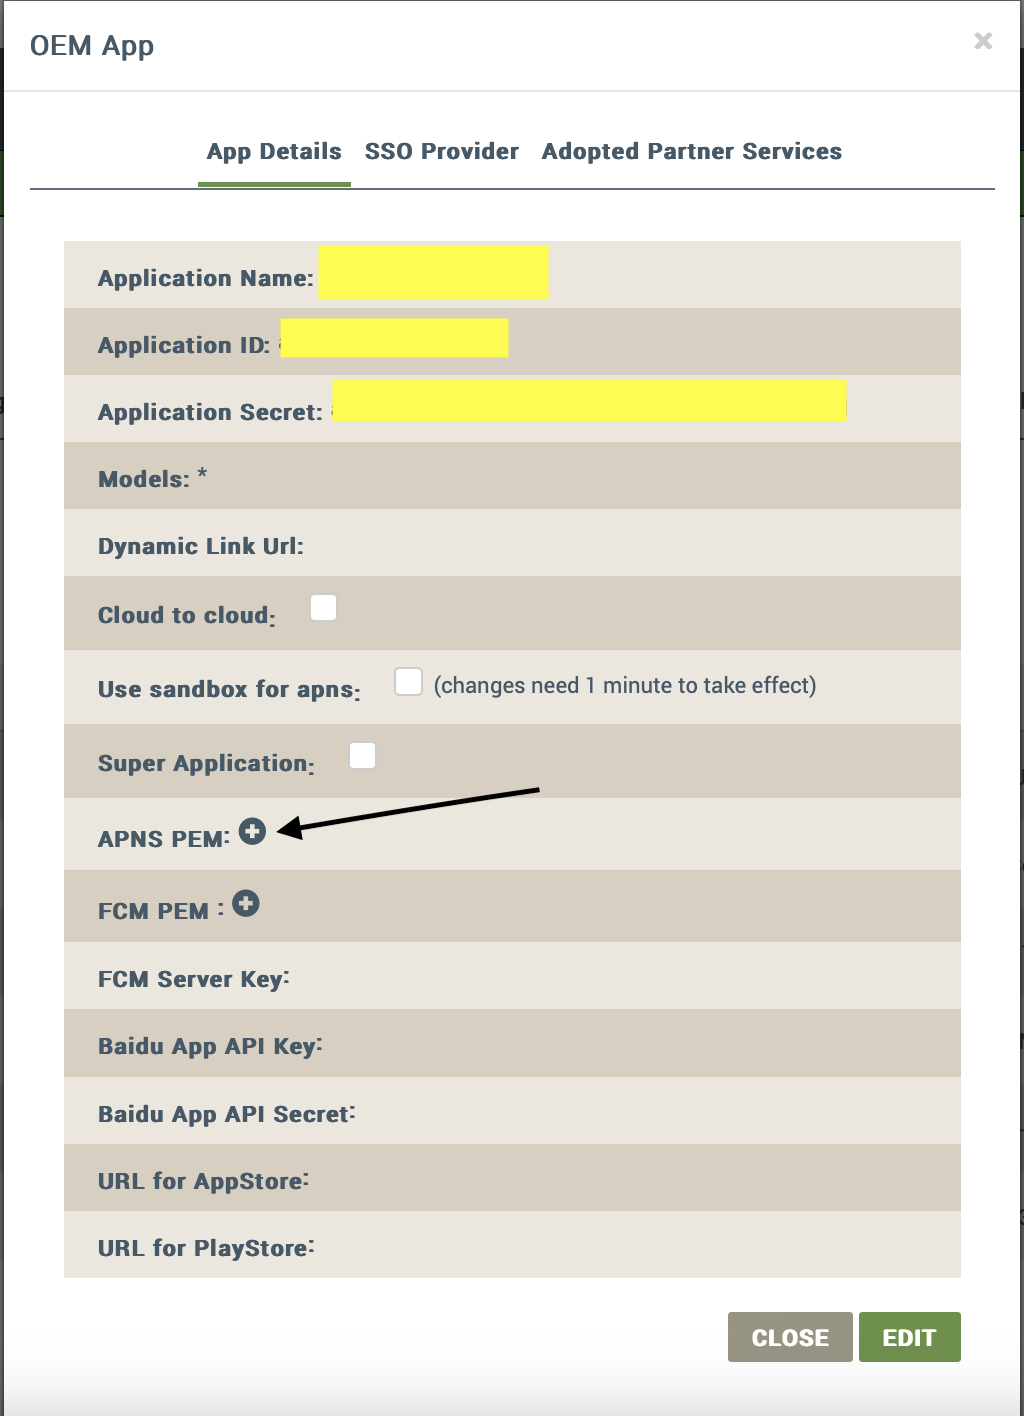
Click "+" to upload the APNS PEM.
-
In the Name field, enter the certificate name.

-
Click Choose file to browse and select the PEM file.
-
In the Passphrase field, enter the certificate password, and then click CREATE.
Once the information above is entered, the screen will appear as follows: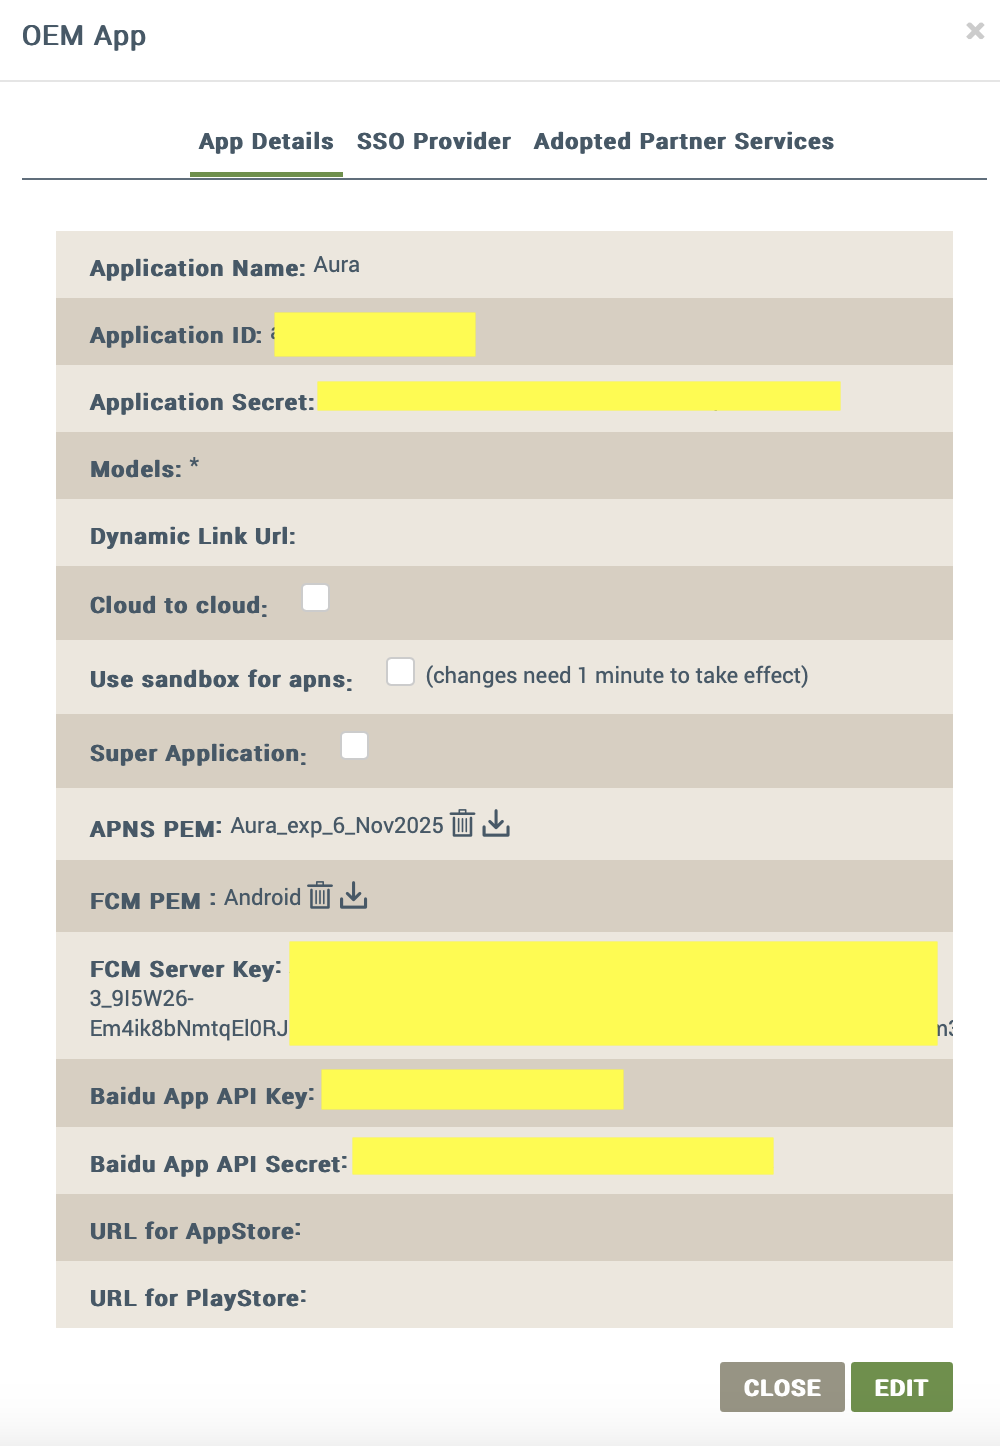
NOTE: If the PEM file has a passphrase, you must enter it when uploading the file to the Ayla Dashboard.
Configuring App for Push Notifications
- Enable Push Notifications in Xcode
- Open your app's project in Xcode.
- Go to Signing & Capabilities.
- Under the Capabilities section, add Push Notifications.
- Create an App ID in Apple Developer Portal
- Visit the Apple Developer Portal.
- Go to Certificates, Identifiers & Profiles > Identifiers.
- Create a new App ID or edit an existing one.
- Ensure Push Notifications is enabled for your app's App ID.
Create APNs Authentication Key or APNs SSL Certificate
You need to create either an APNs Authentication Key (recommended) or an APNs SSL Certificate. These are used by your server to authenticate when sending push notifications to APNs.
For details on how to configure push notifications Please refer to iOS remote push notifications in a nutshell.
Steps to create a PEM file
-
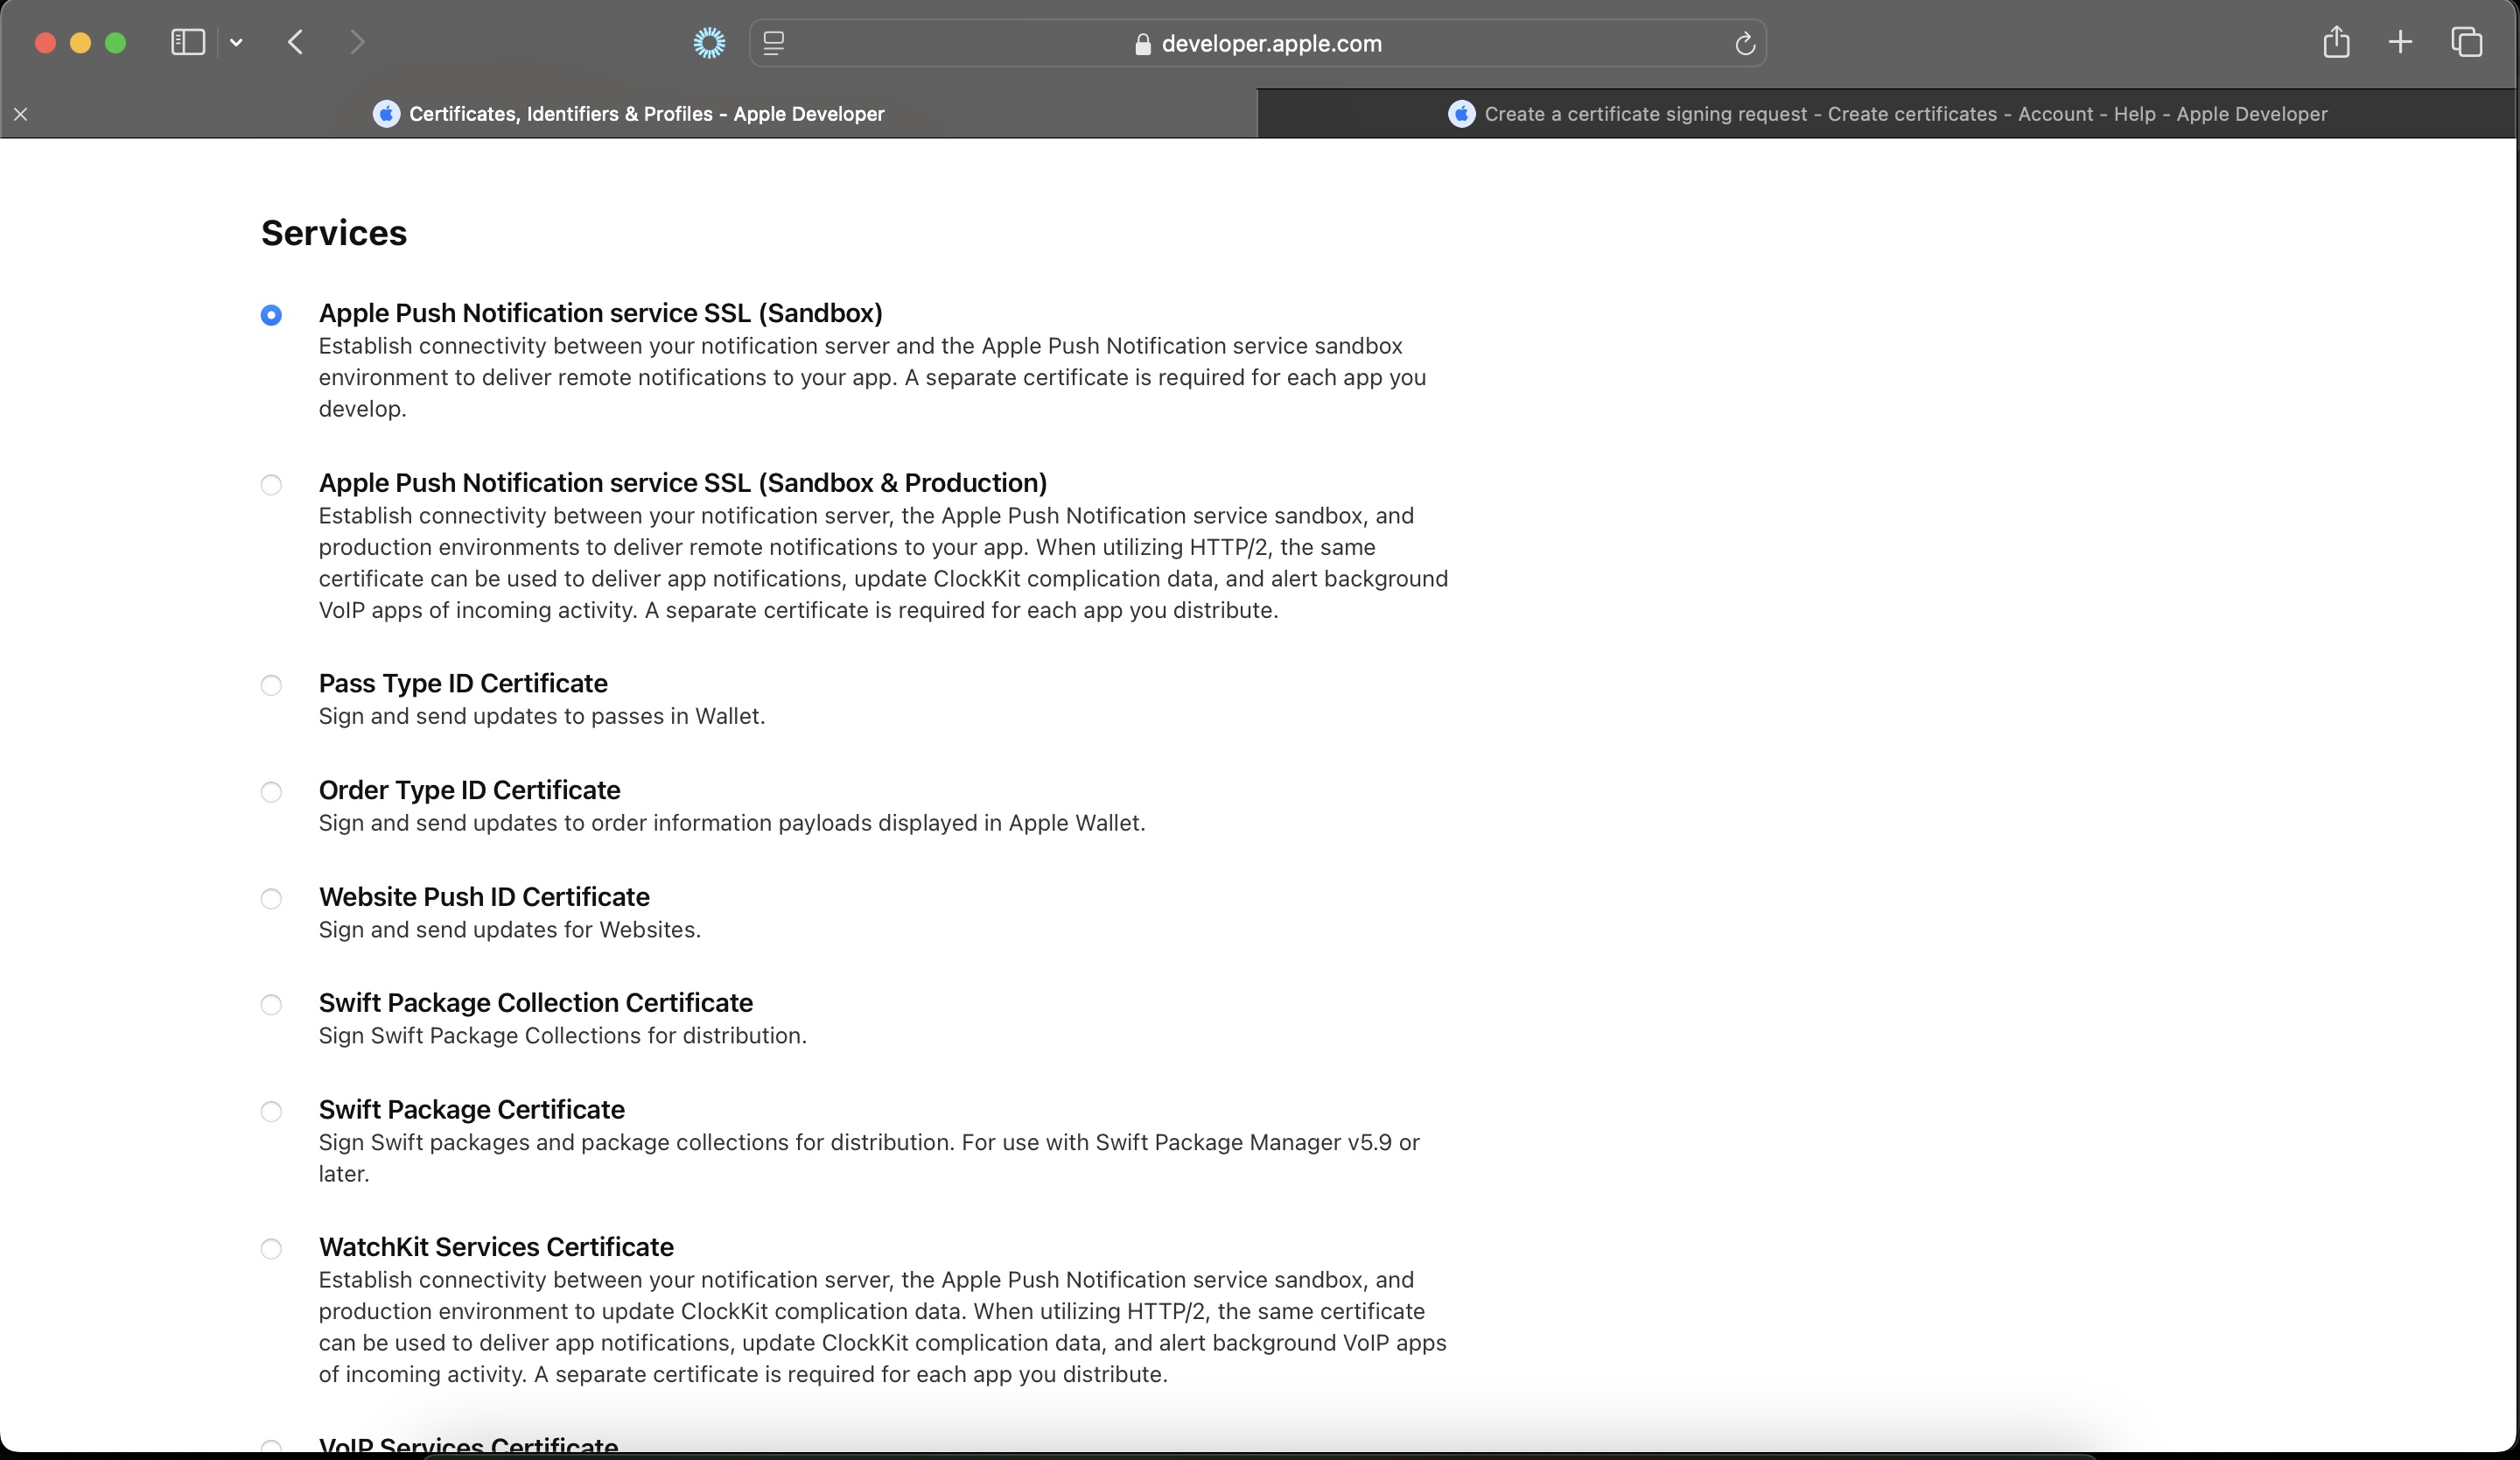
Login to Apple developer account and go to Certificates section
-
Create a new certificate.
-
Create a CSR using Keychain
On the Keychain Access menu, select Request a Certificate from a certificate authority….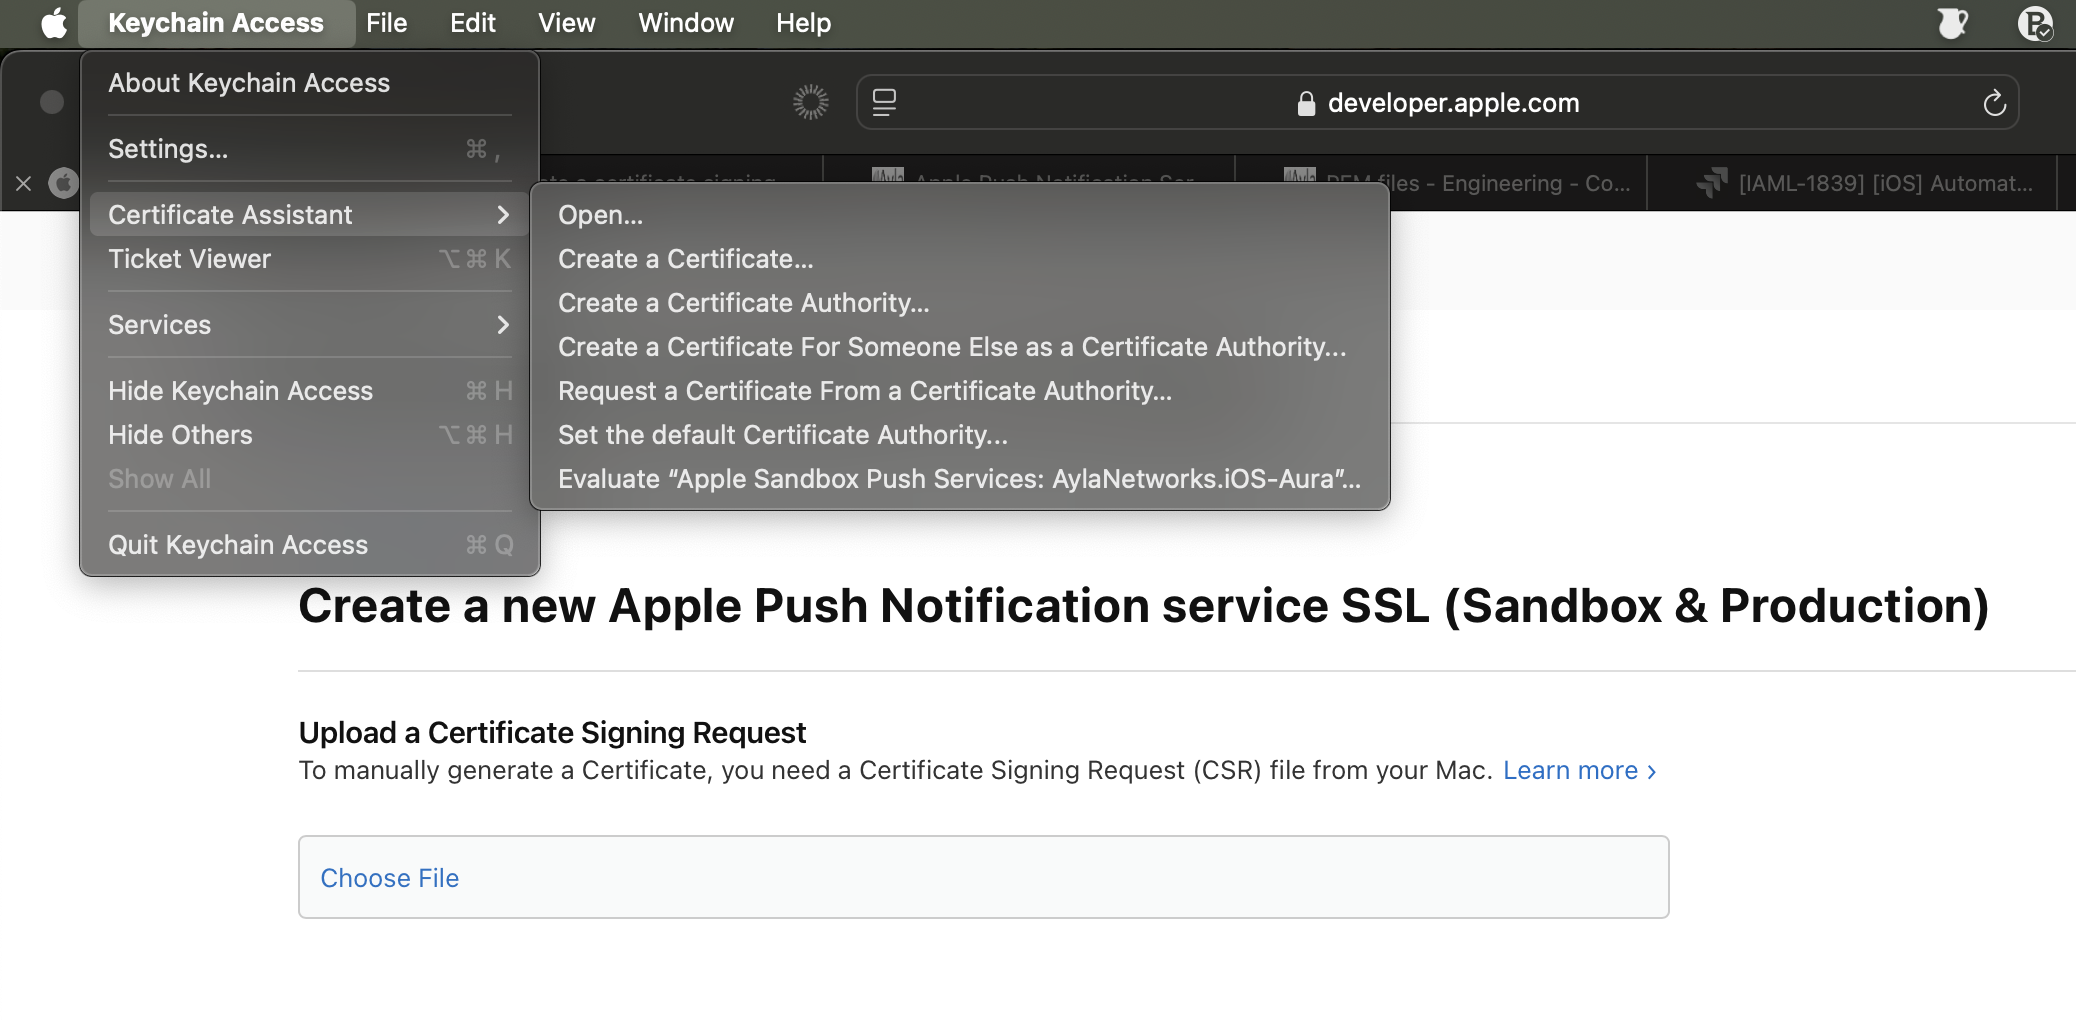
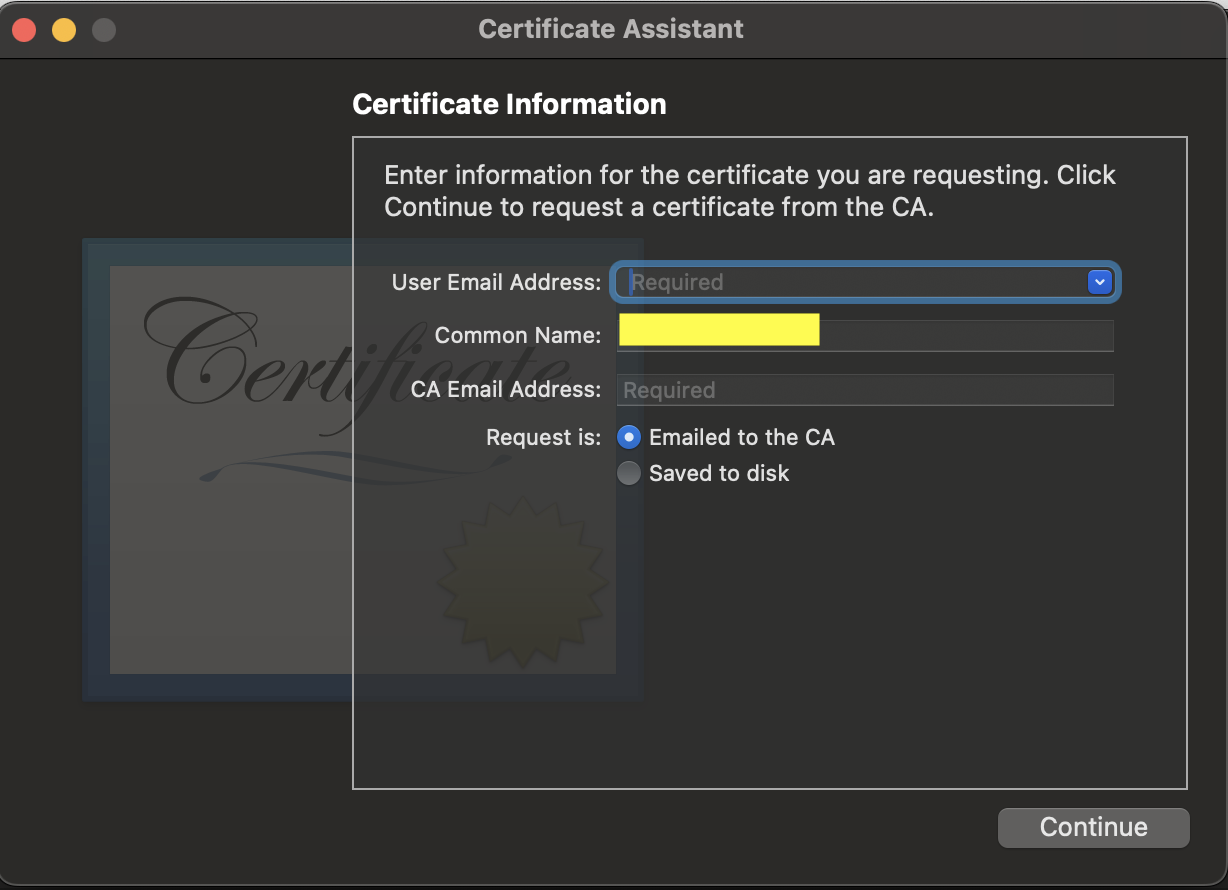
Enter your email id and select the Saved to disk option.
-
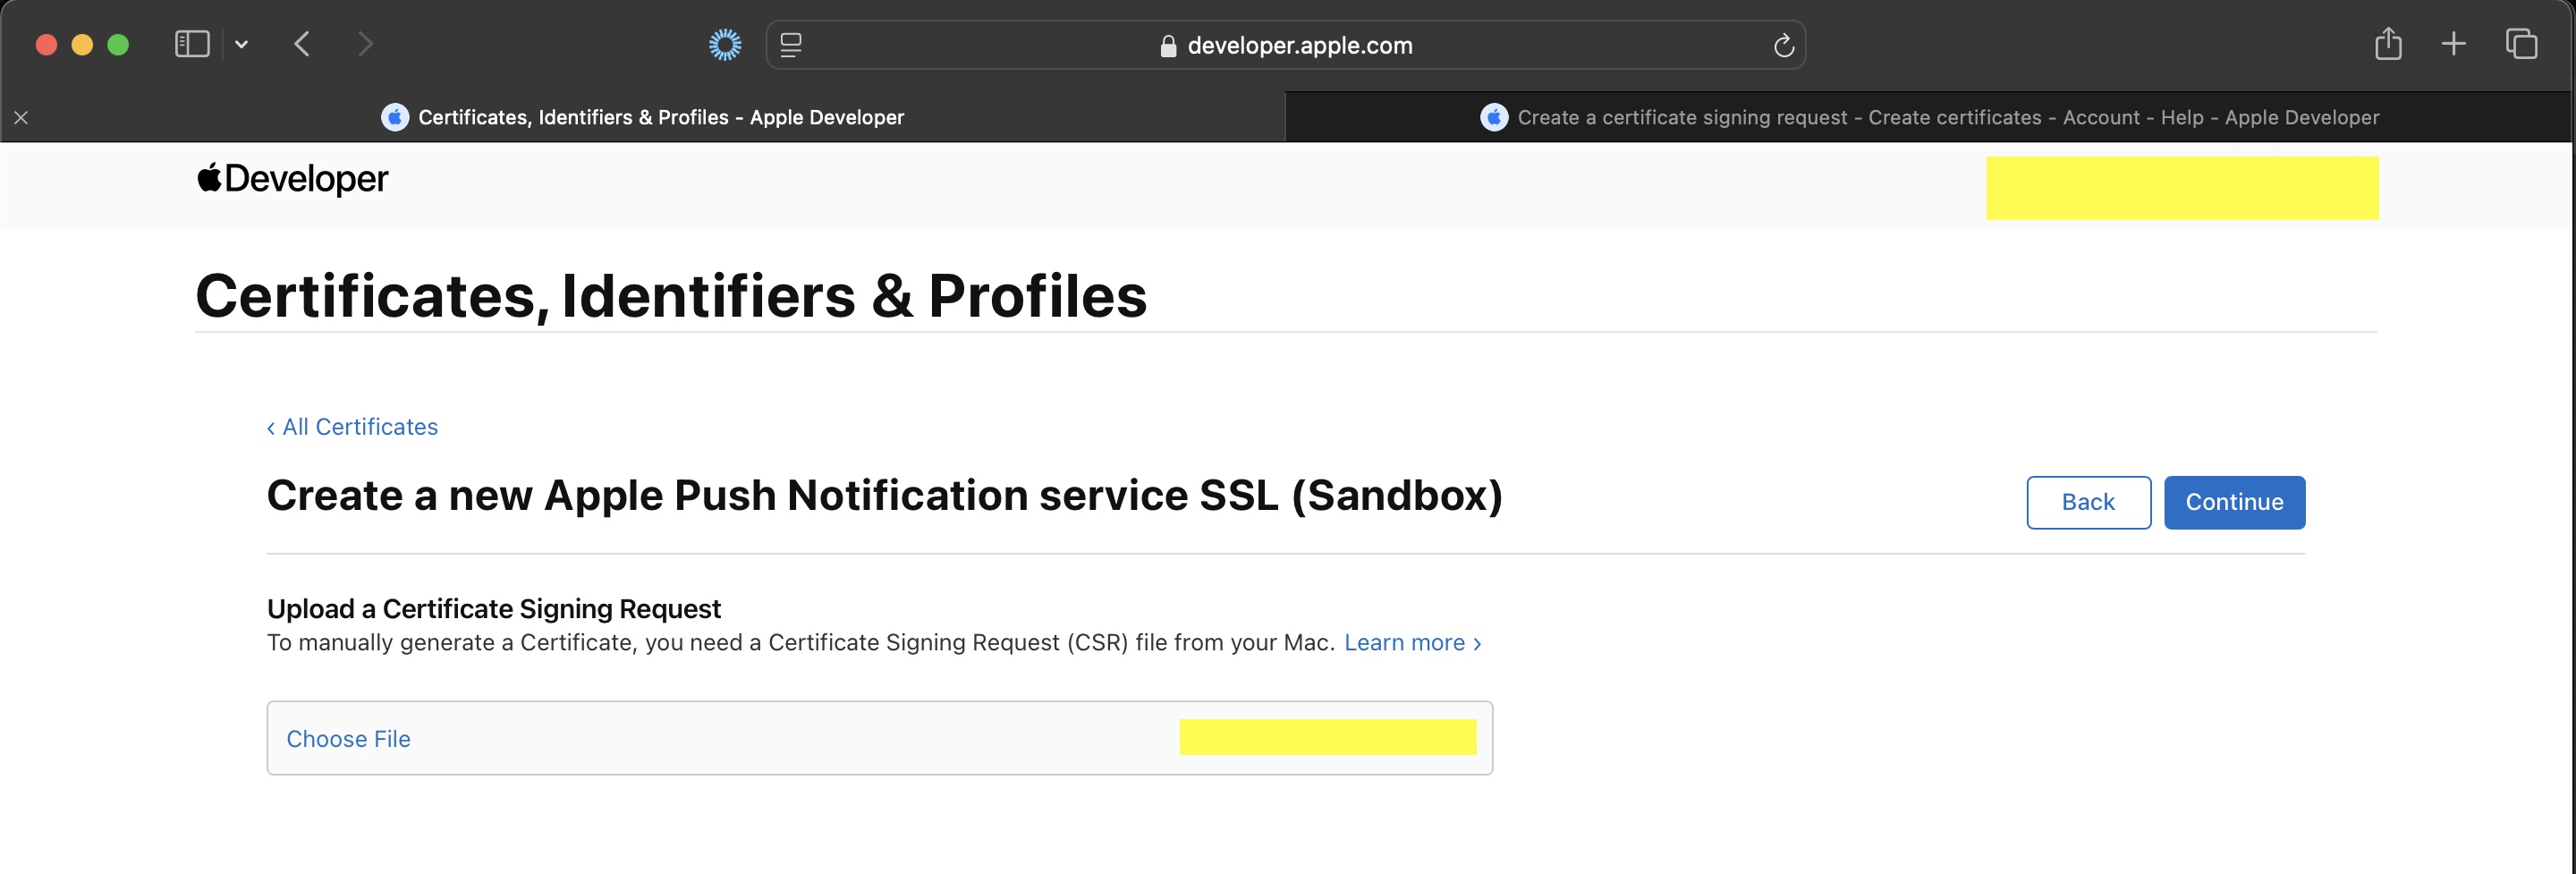
On the Certificates, Identifiers & Profiles page, upload the .certSigningCertificate, click Continue.
-
Click Download. The .cer file will be downloaded.

-
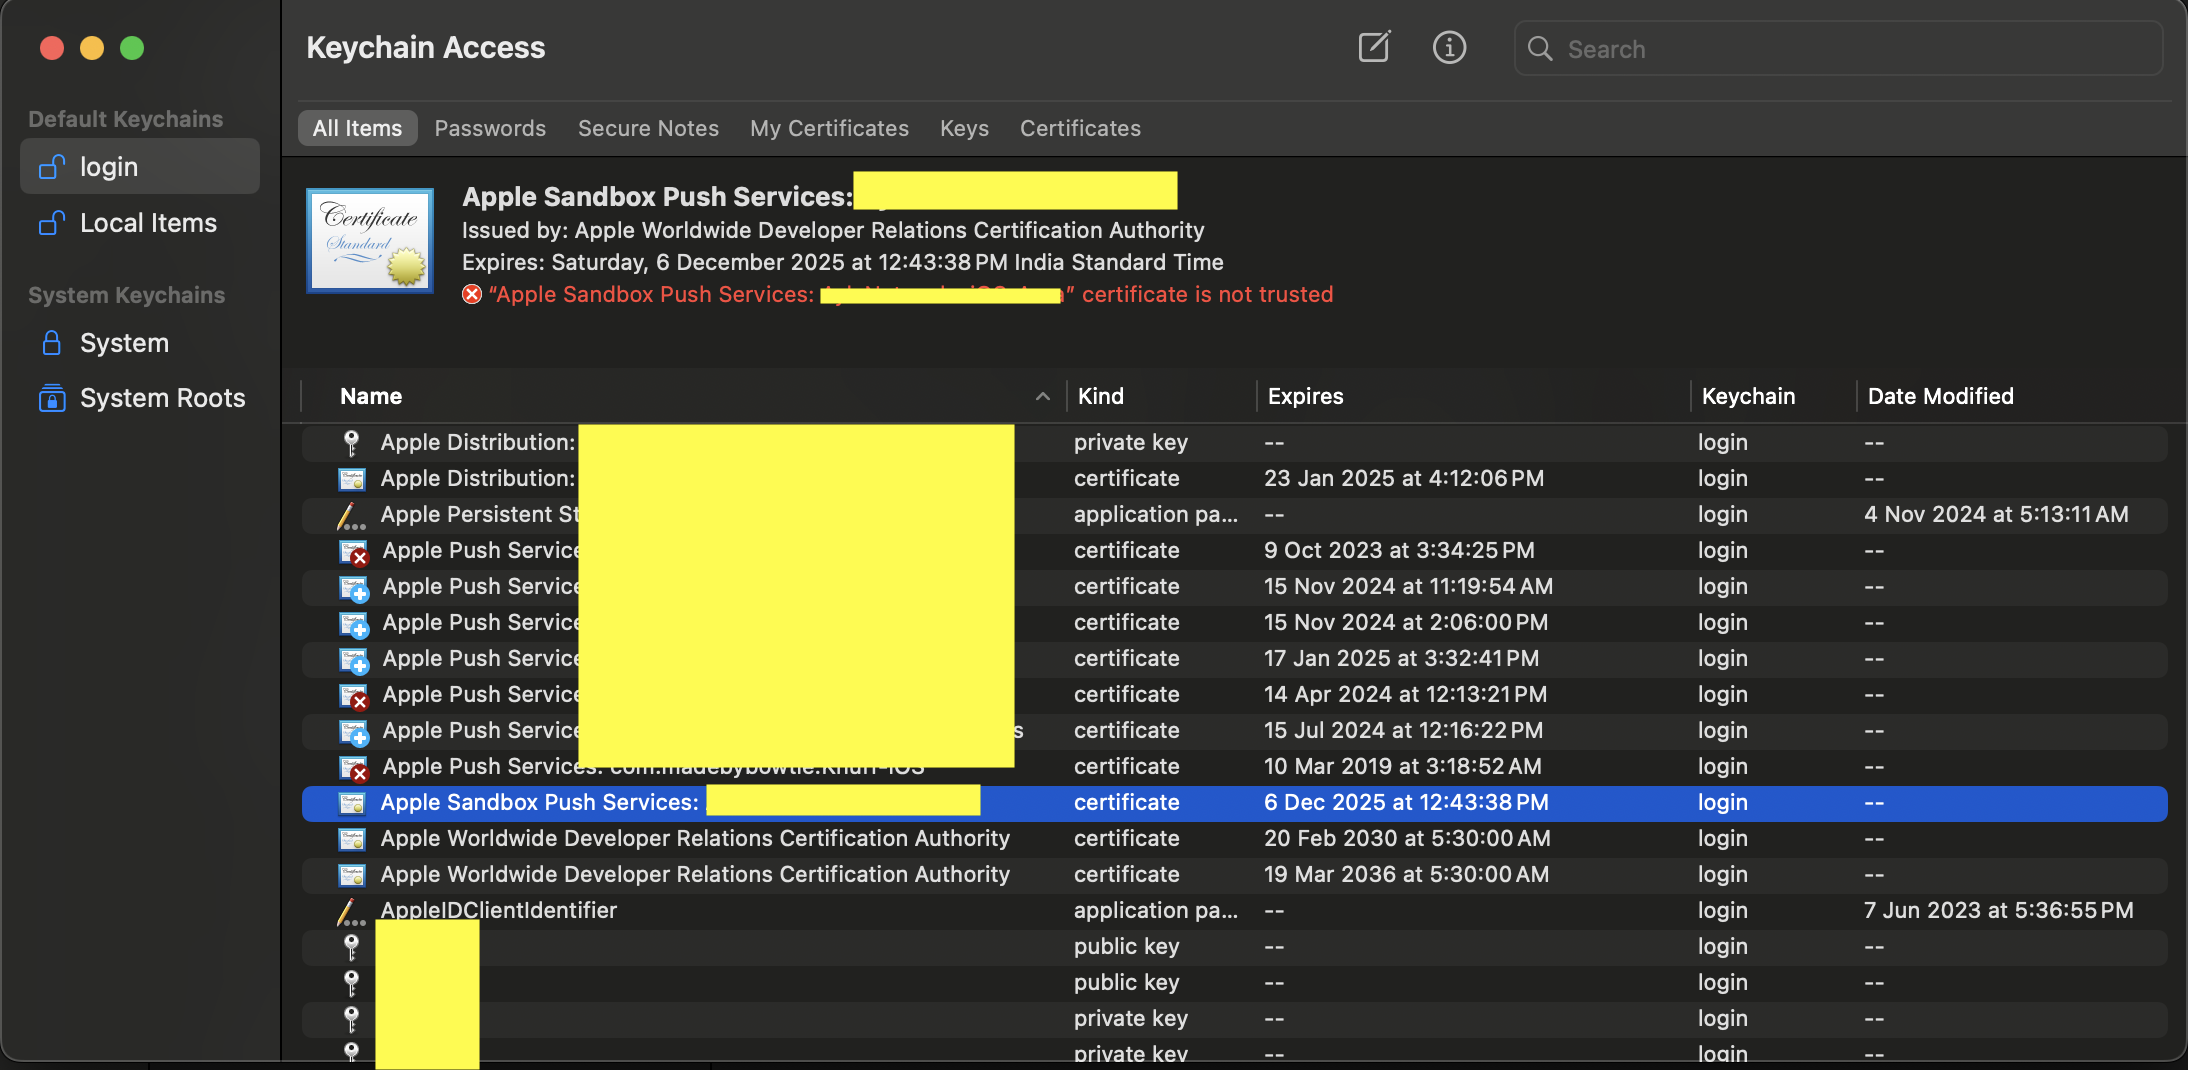
Go to the Downloads folder and double click the .cer file, it will open in the Keychain access.
-
Double-click the certificate to trust it and and select Always Trust. Enter system password to confirm the same.
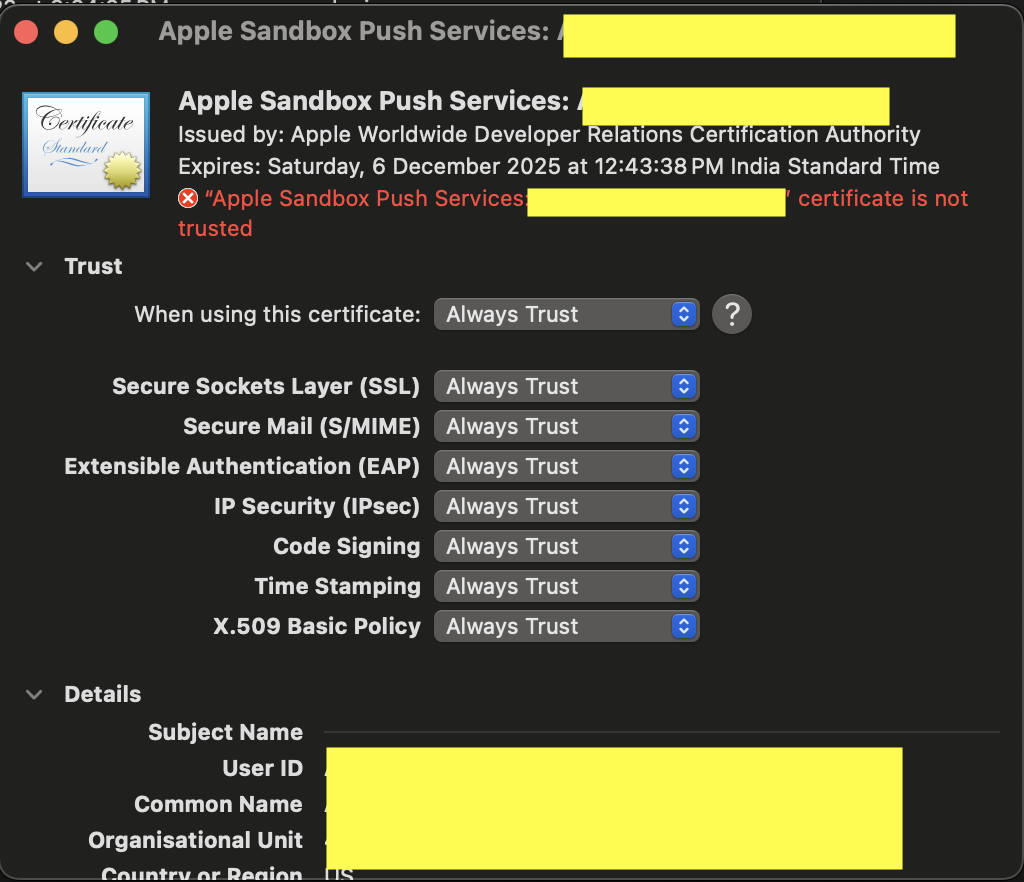
-
After following the above steps, the screen looks as shown in the following screenshot. You will see the message “This certificate is marked as trusted for this account”.
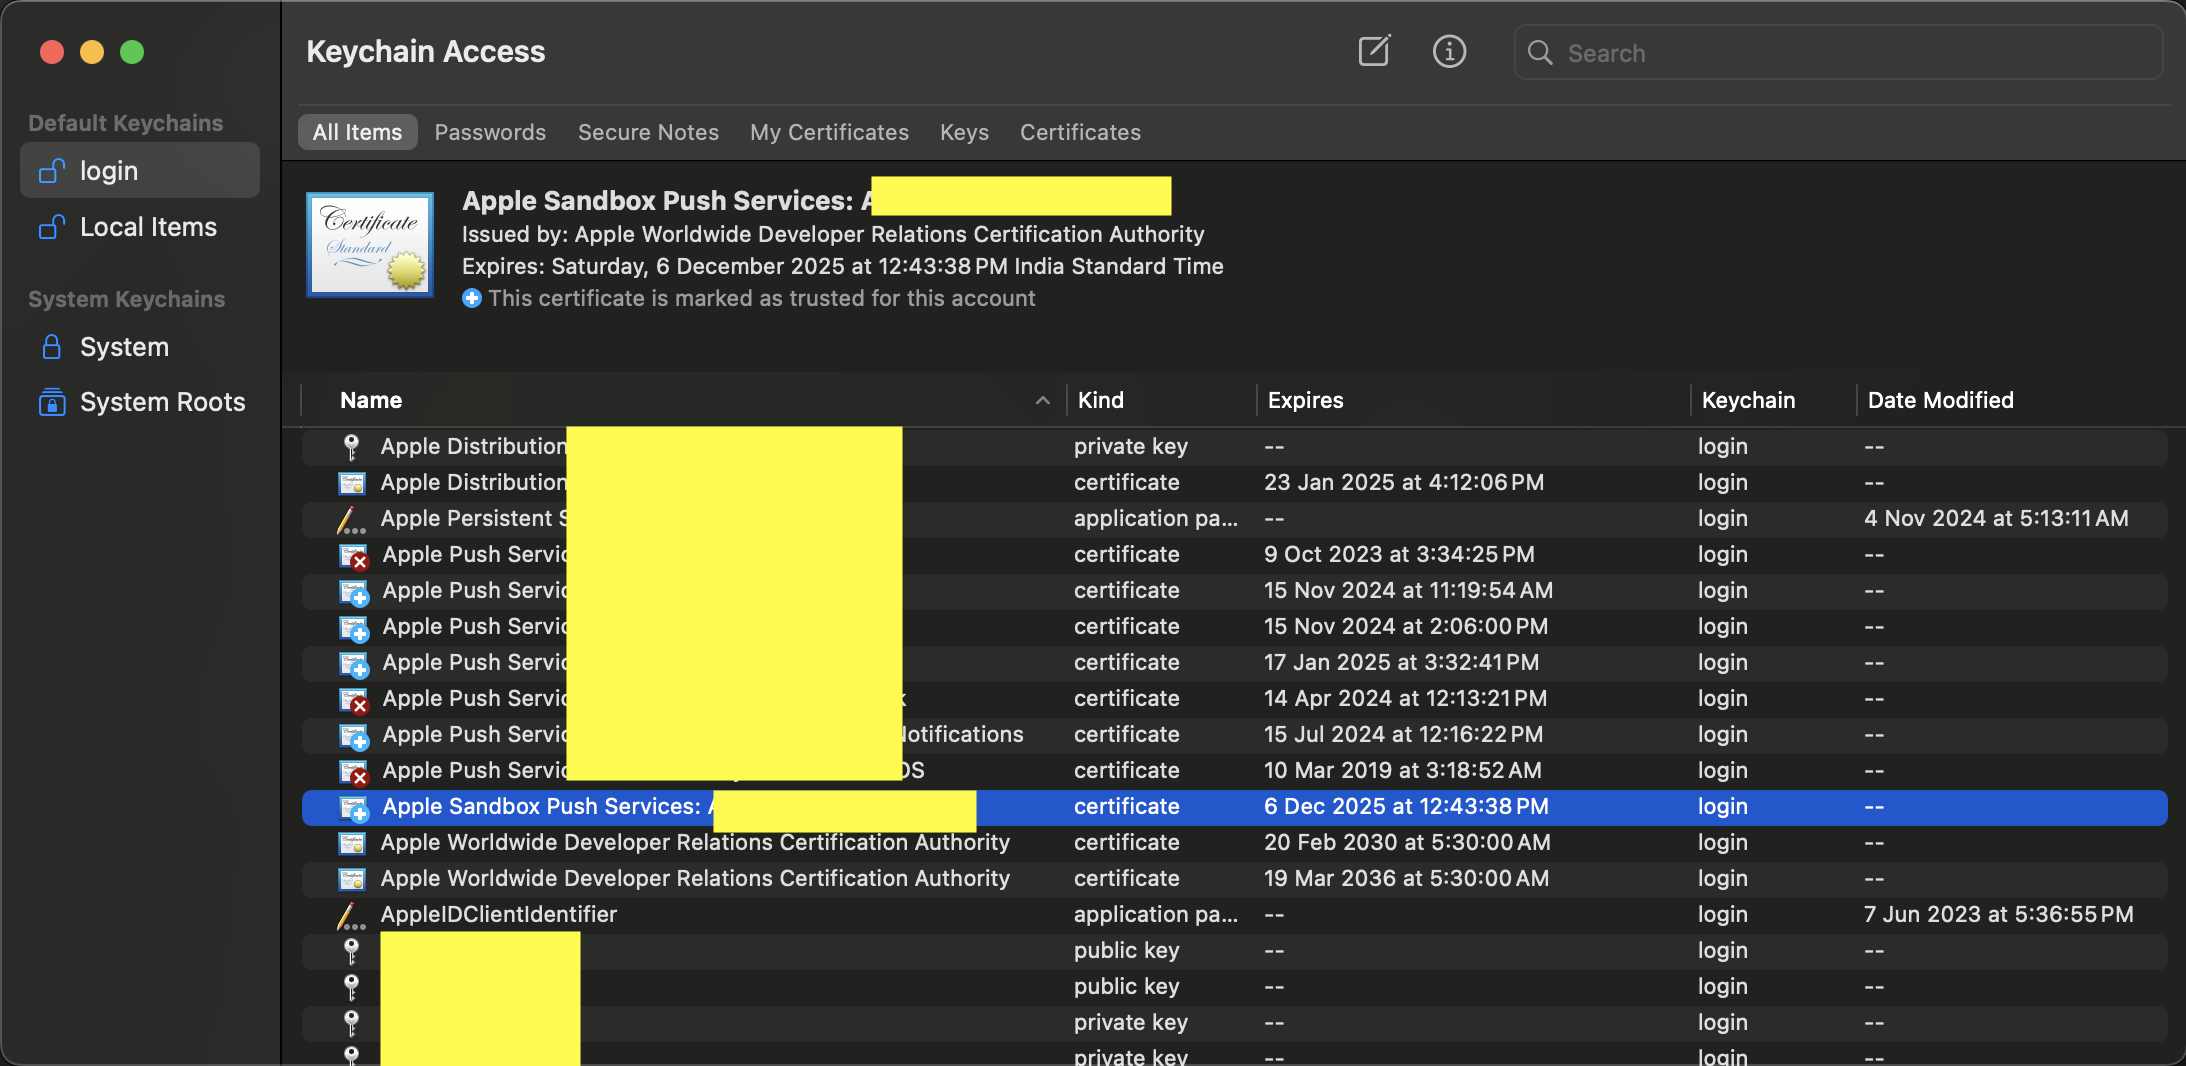
-
Right-click on the newly created Push Service certificate along with the private key, and select Export to generate a .p12 file.
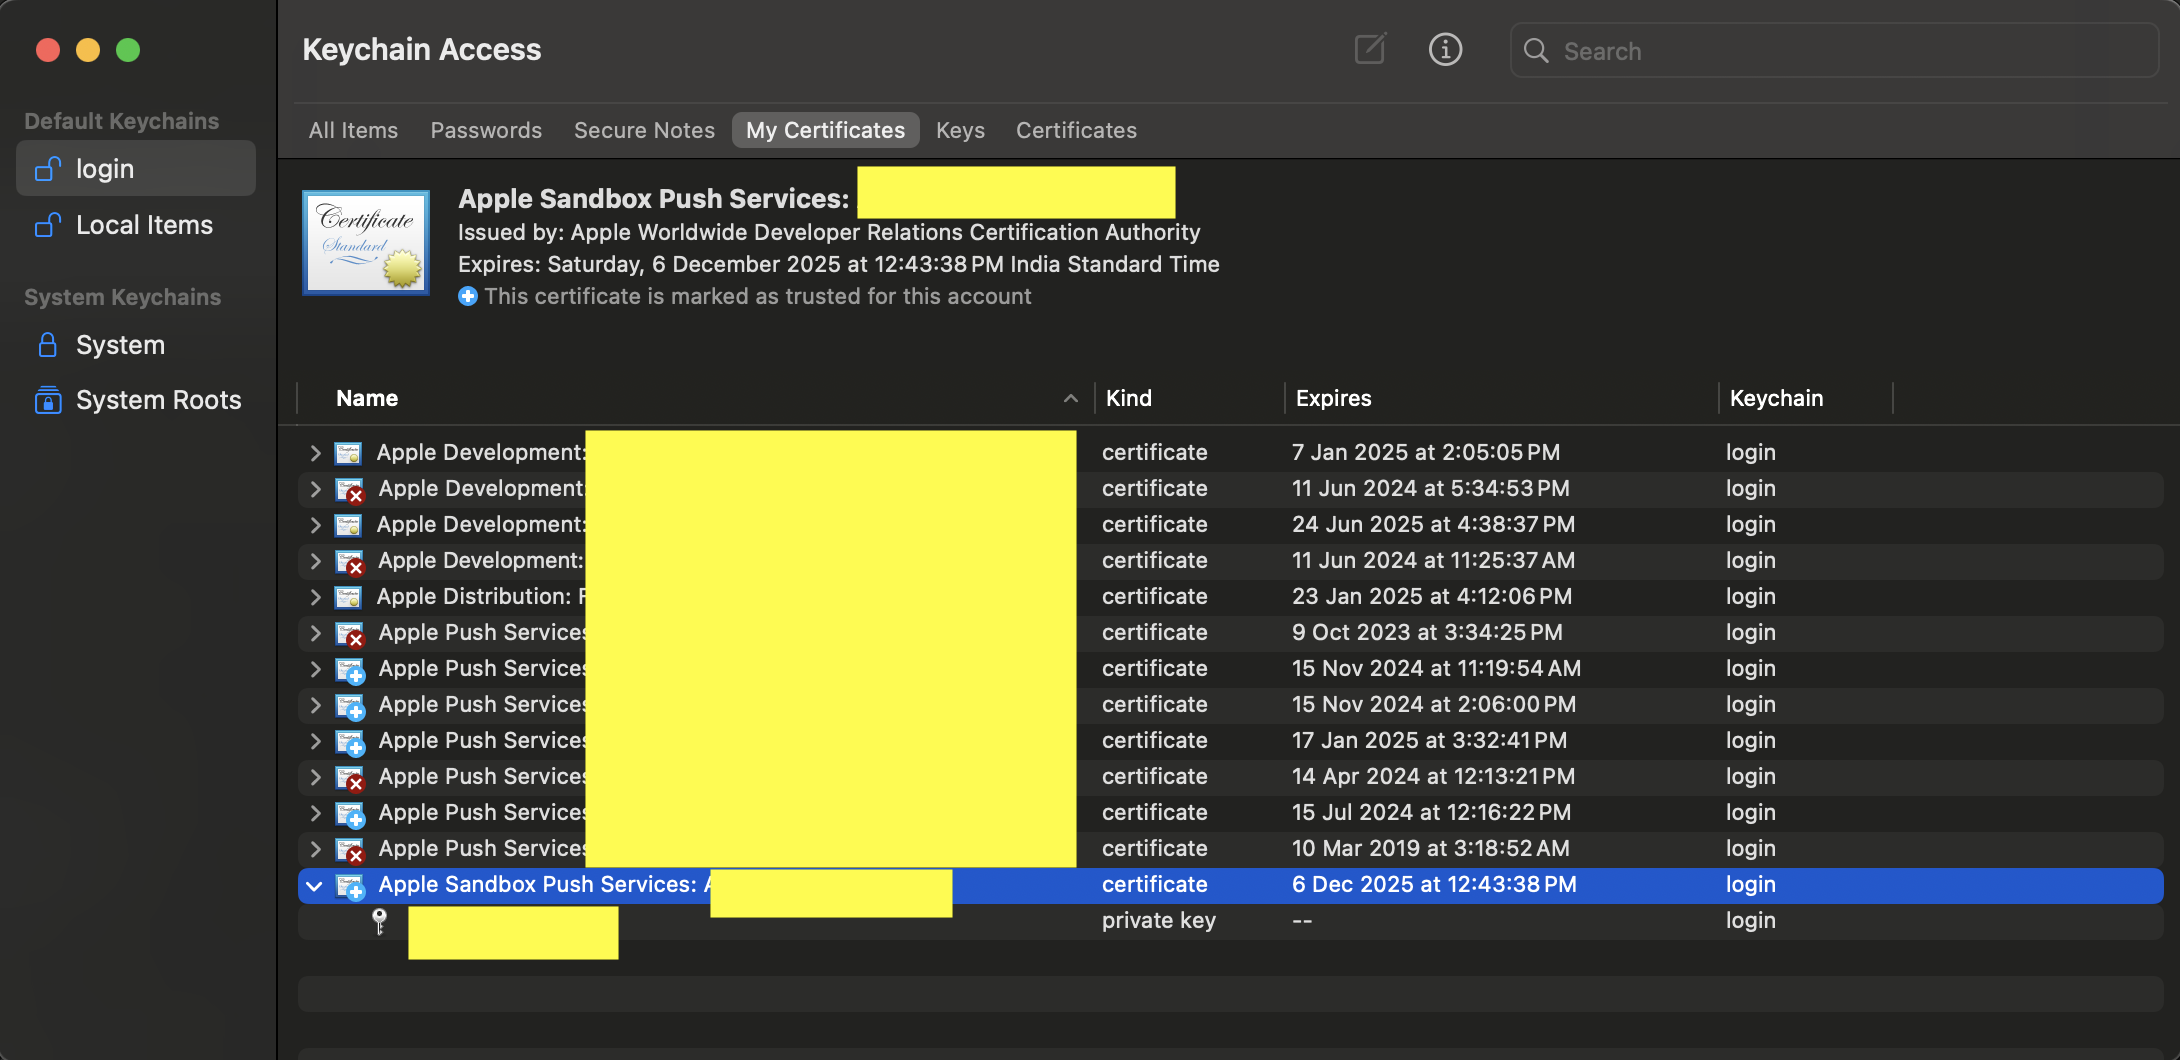
-
Enter the password for the .p12 certificate and lick OK.
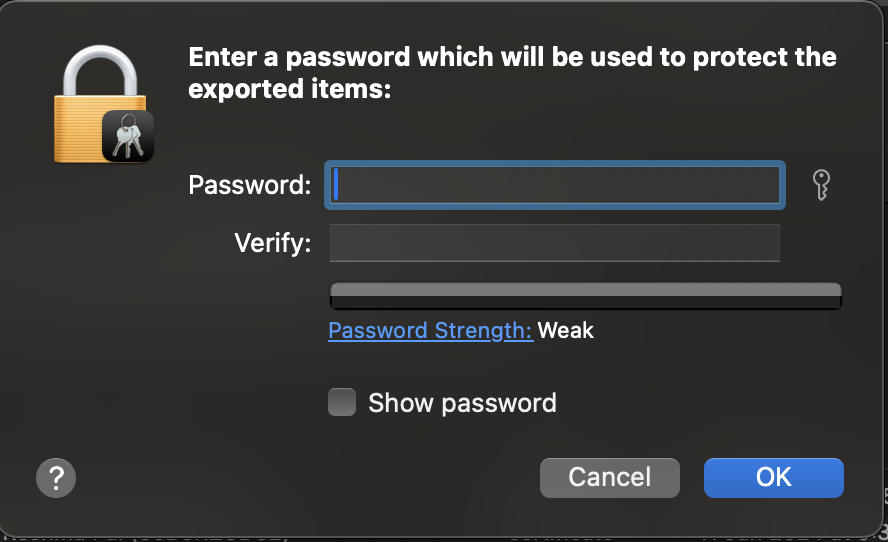
-
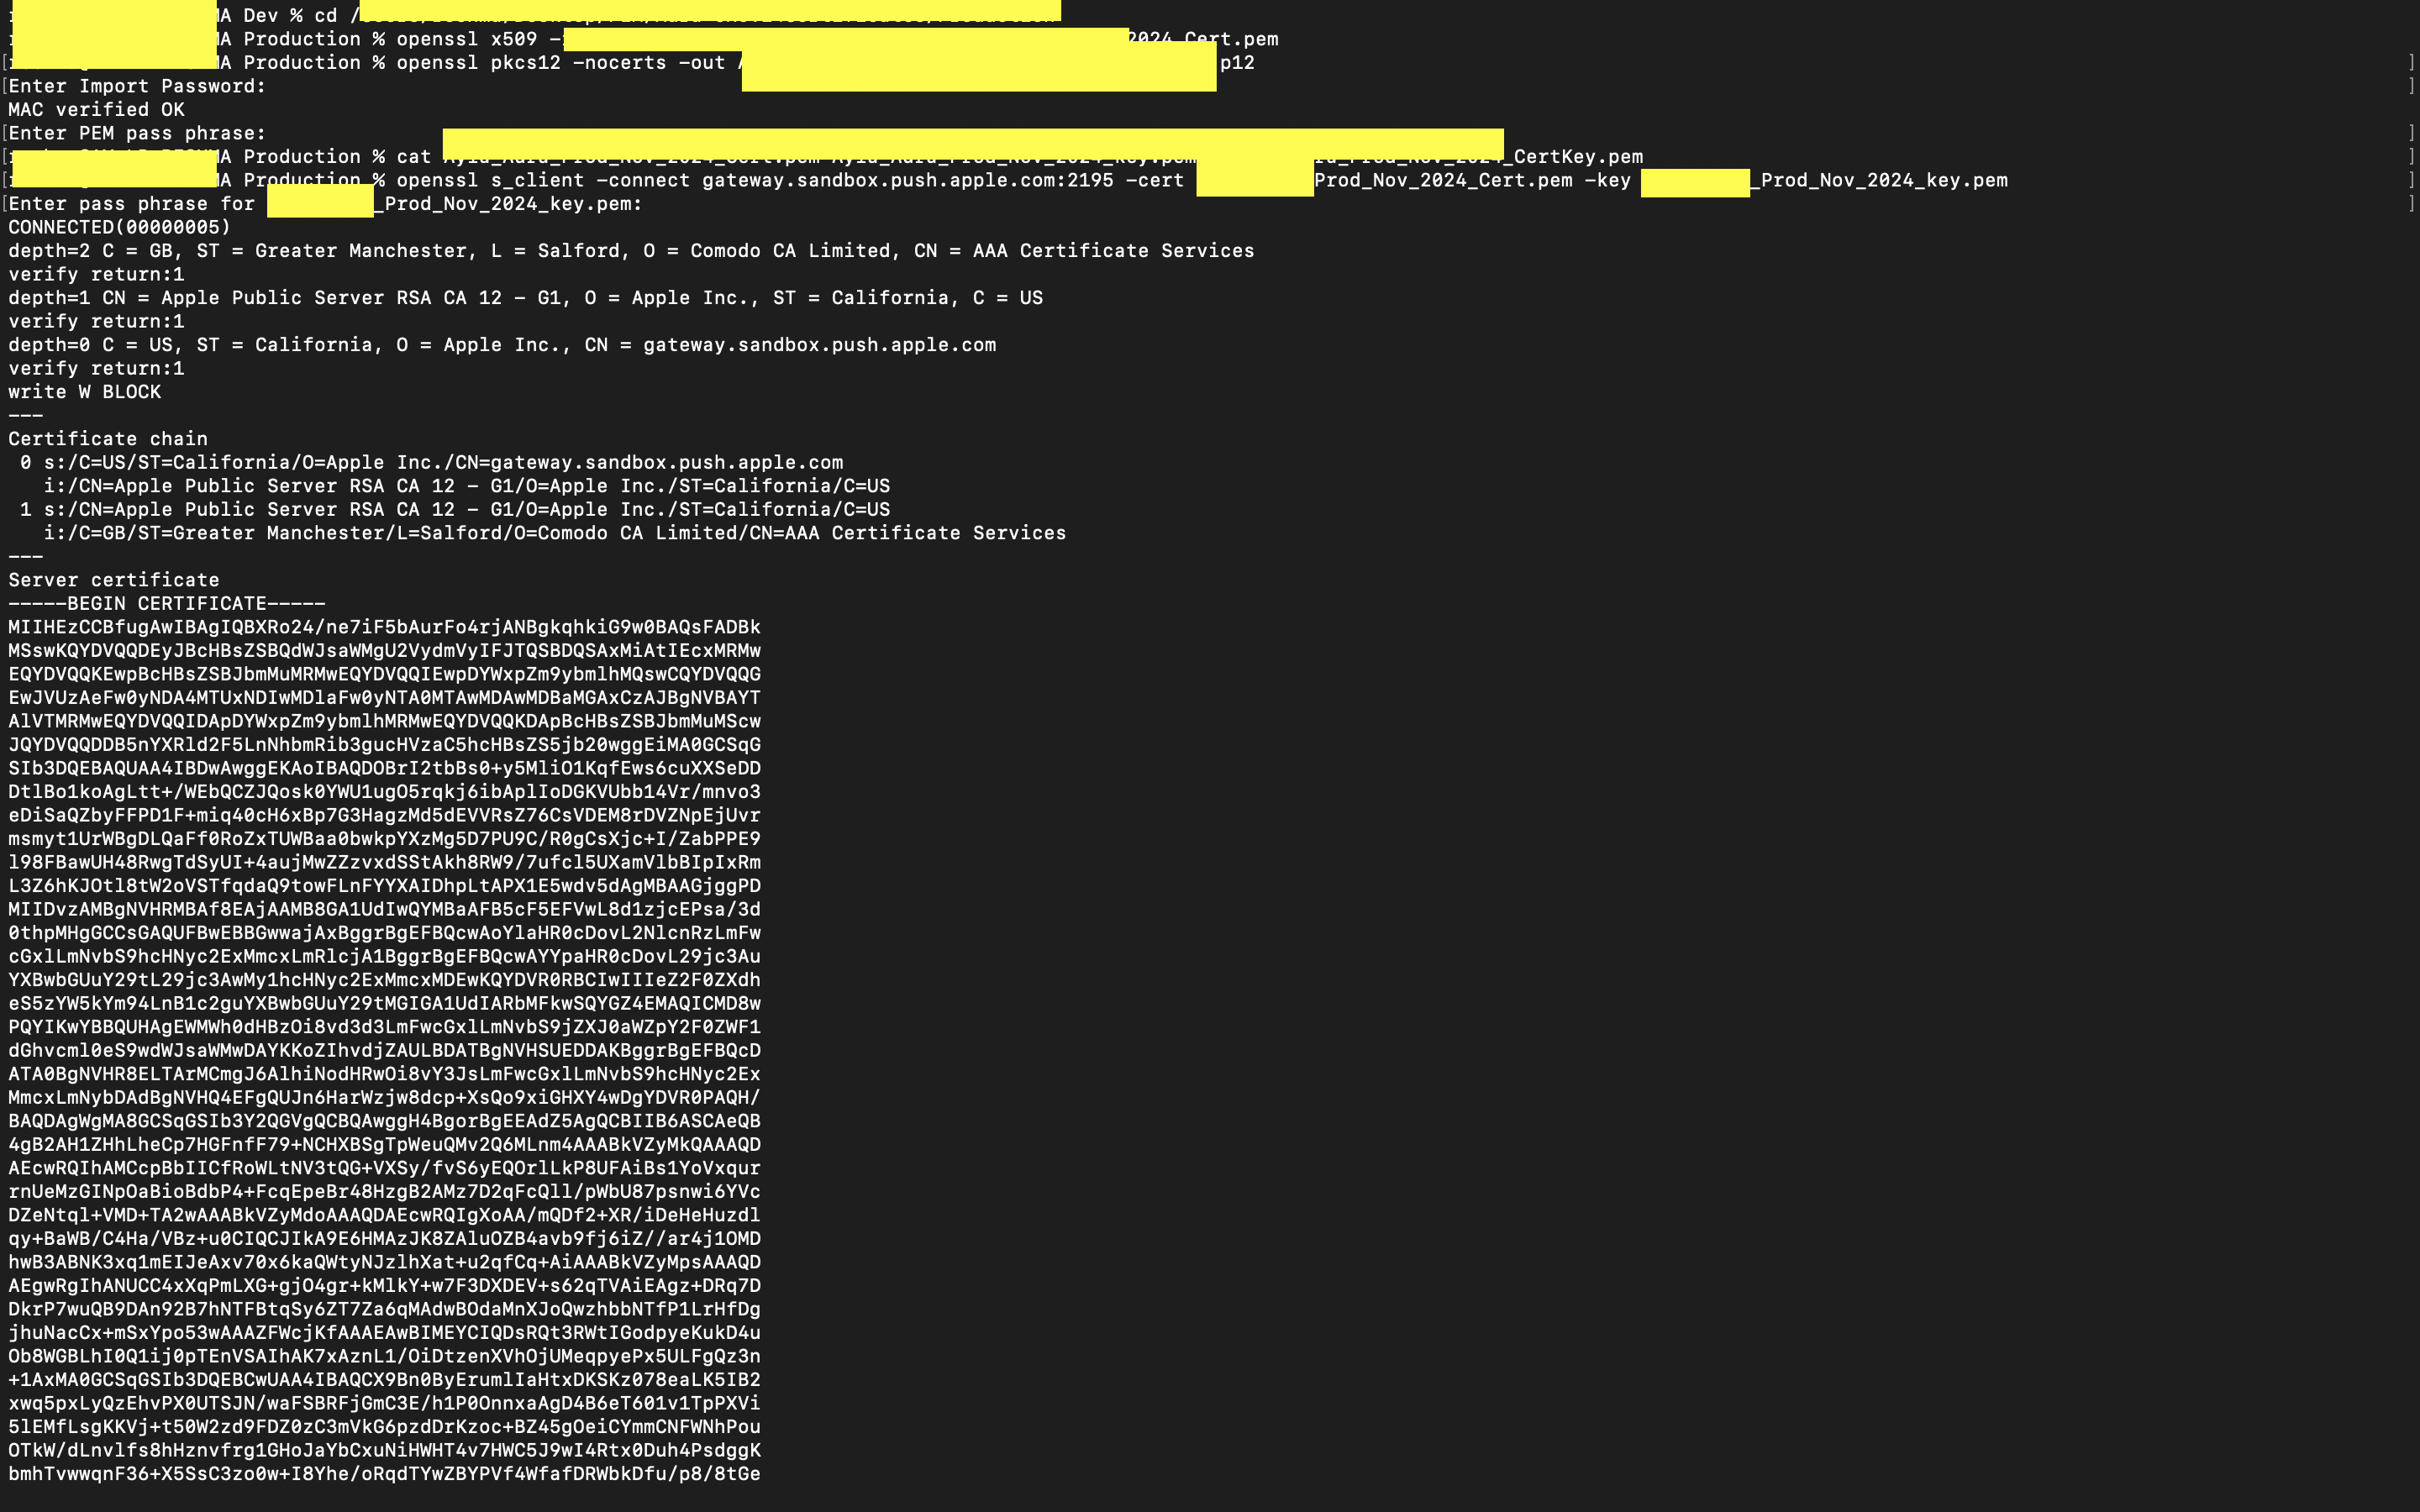
Generate the .pem file using following commands. This generates a PEM file which is a combination of certificate-key pair.
openssl s_client -connect gateway.sandbox.push.apple.com:2195 -cert Company_PN_Prod_Nov_2024_Cert.pem -key Company_PN_Prod_Nov_2024_key.pem
openssl s_client -connect gateway.push.apple.com:2195 -cert Company_PN_Prod_Nov_2024_Cert.pem -key Company_PN_Prod_Nov_2024_key.pem
-
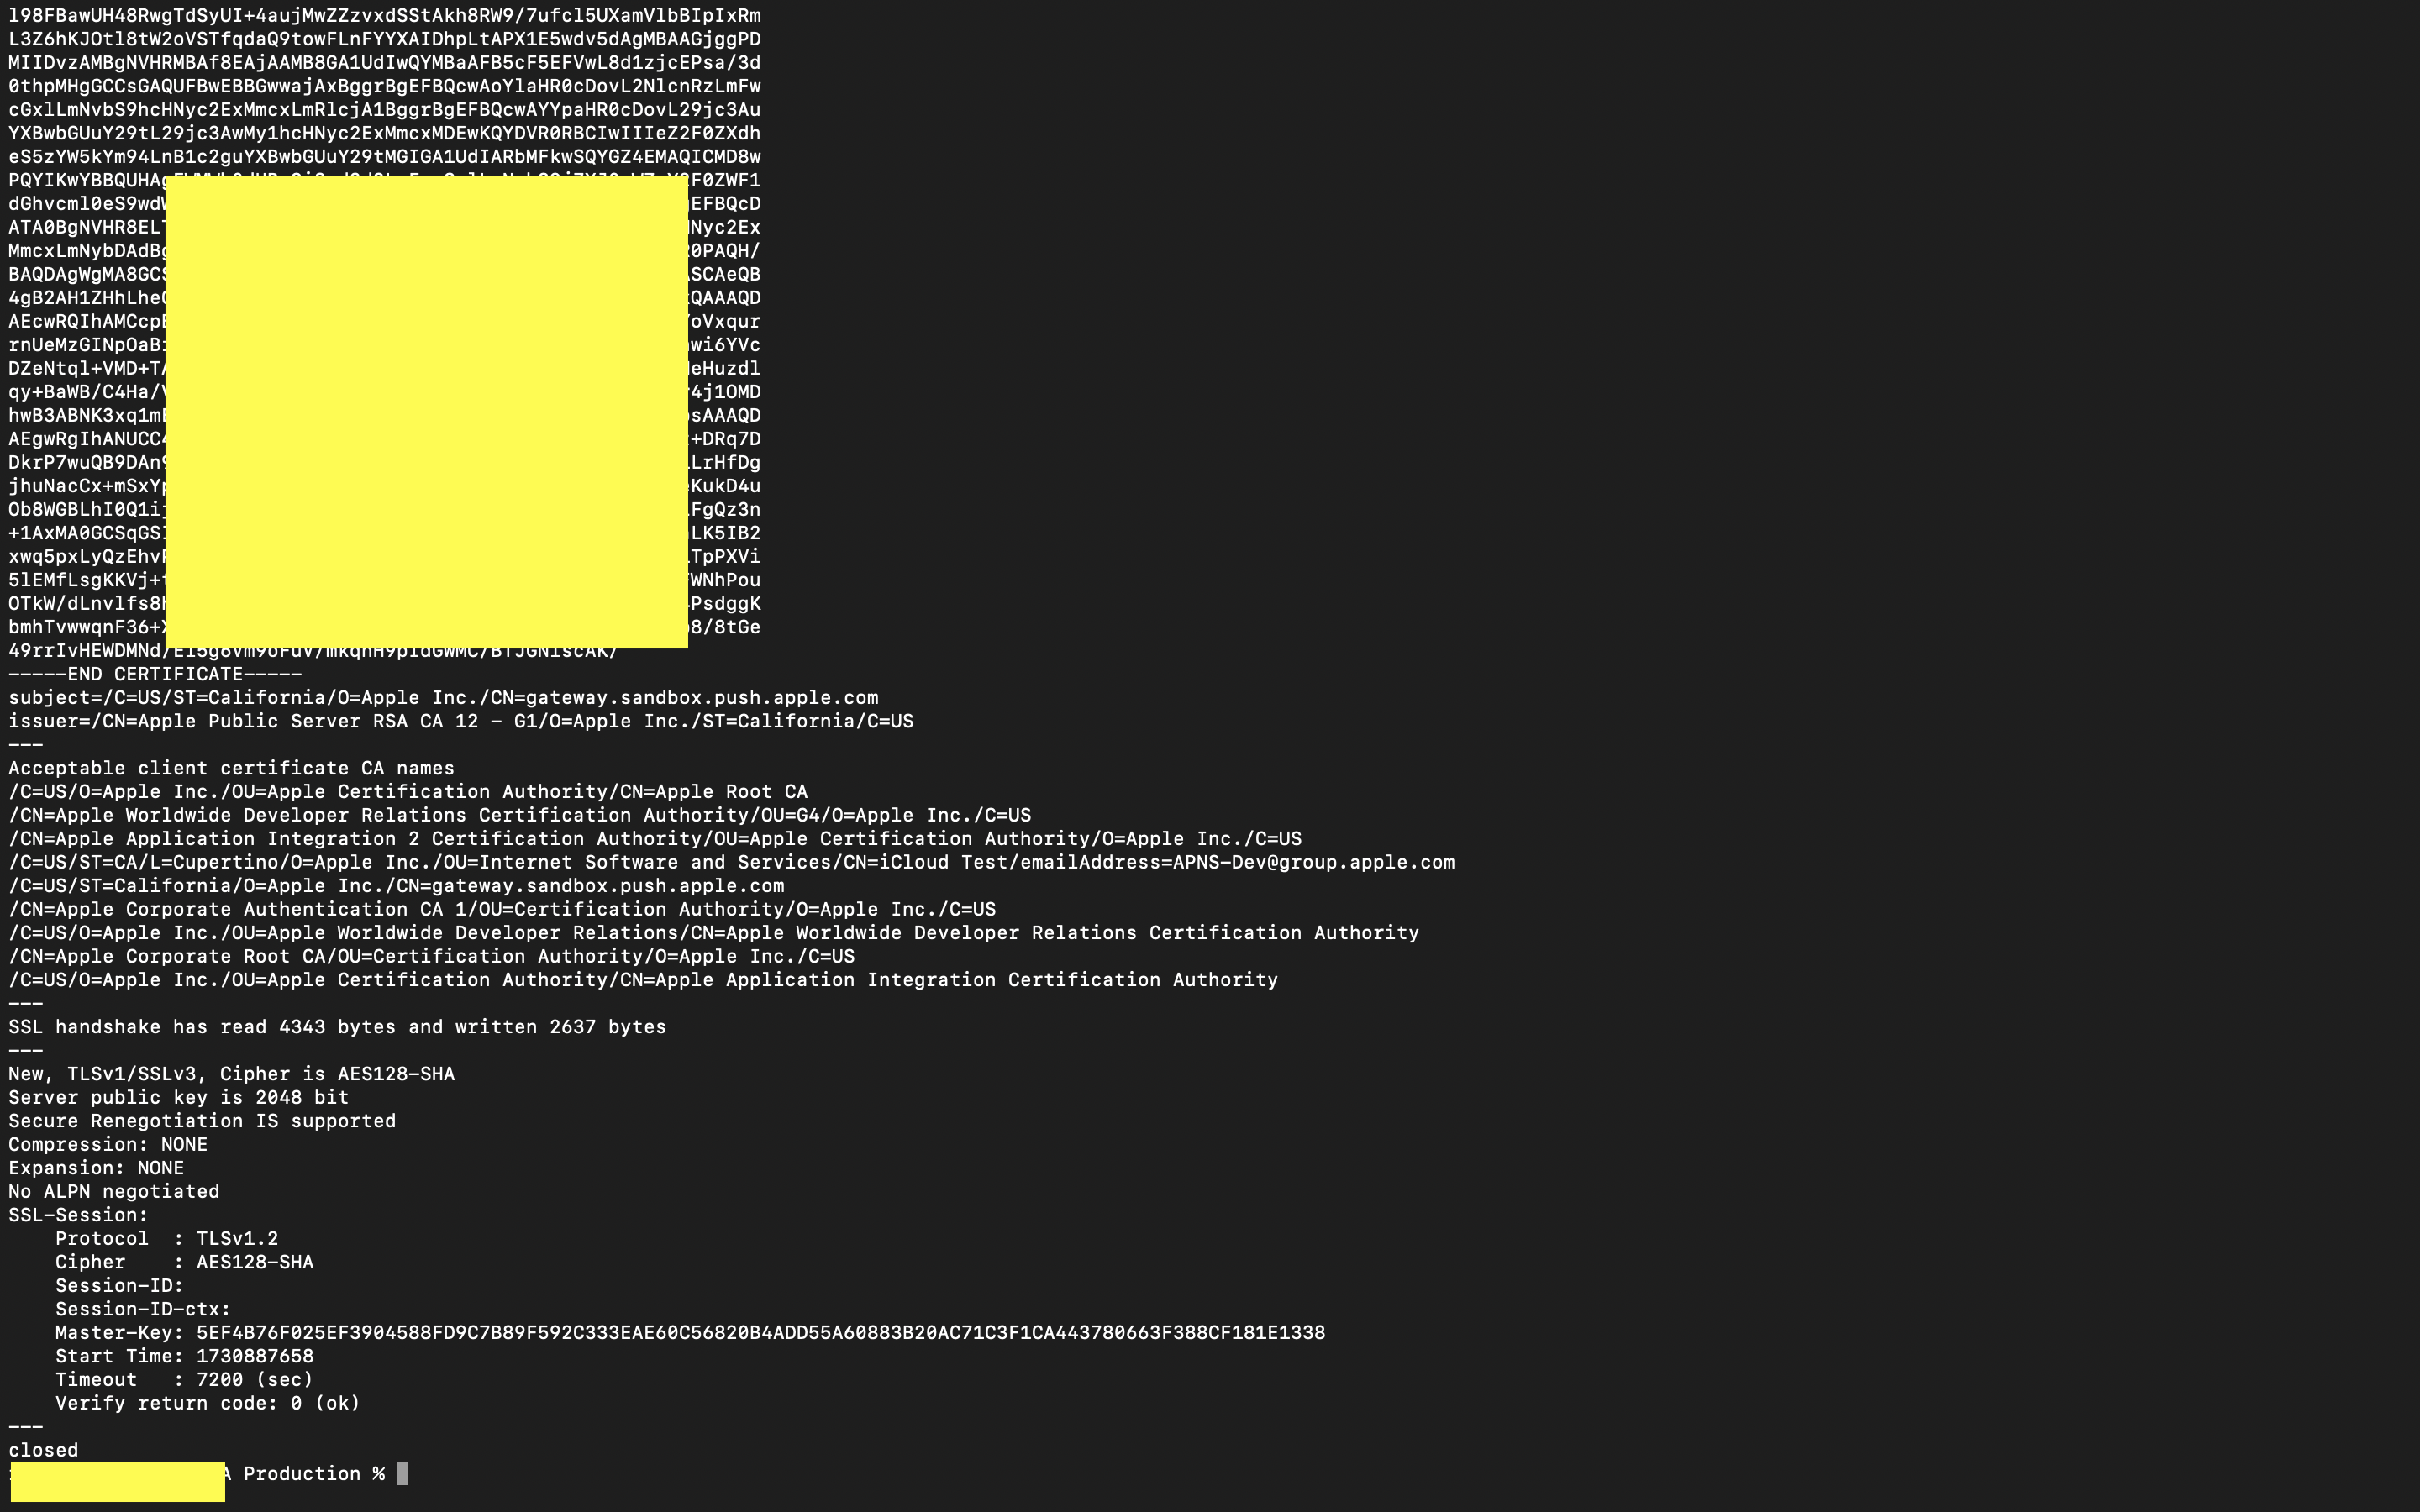
Verify that the certificate is valid by using the following commands.
openssl s_client -connect gateway.sandbox.push.apple.com:2195 -cert Company_PN_Prod_Feb_2015_Cert.pem -key Company_PN_Prod_Feb_2015_key.pem
openssl s_client -connect gateway.push.apple.com:2195 -cert Company_PN_Prod_Feb_2015_Cert.pem -key Company_PN_Prod_Feb_2015_key.pem
After the successful verification, we get the output as follows:
Updated 8 months ago
