Editing Job Configurations
In the Command Center, you can make changes to most configurations for all job types if the job has not been started. This section of the Command Center features guide describes the edit workflow.
Before getting started, the editing capabilities require that you have one of the following dashboard roles (permissions):
- OEM::Admin
- OEM::Staff
- OEM::SupportManager
- OEM::SupportEngineer
Refer to the Users and Roles guide for information on dashboard roles.
The Edit Workflow
Getting Started
The edit workflow is the same for all job types. Again, you can only edit jobs that have not been started. To initiate the edit workflow, you must first find and click the entry for the job on the Jobs tab. By default, this opens the Job Summary tab for the selected job. Refer to the following example:

The Job Summary tab provides high-level details about the job (all of which you cannot change):
- Name - the user-assigned name entered when creating the host OTA job.
- Status - the current state of the job.
- Created At - the date and time when the job was created (in UTC).
- Last Modified At - the date and time (in UTC) of the most recent changes to the job.
- Last Modified By - the user-assigned information on the user who last modified the job.
- Started At - the date and time (in UTC) that the job was last started.
- Finished At - the date and time (in UTC) of the last time that the job completed. If the job has not started, is in progress, or was cancelled this field is blank.
Notice the CLOSE button in the example of the Job Summary tab above; this indicates that you cannot edit the information on this tab.
How Editing Works
To provide you with an easy-to-use, consistent workflow, the editing capabilities are the same for all your configurations. For all job types, the configurations are on the following tabs:
- Job Details
- OTA Attributes
- Filter
- Schedule
Also for ease of use, the tabs in the edit workflow mirror each step in the create job workflow, as shown in the example below:

Left: Shows Job Details Tab in Edit Workflow
Right: Shows Step 1 in Create Job Workflow
After clicking your job entry on the Jobs tab, which opens the Job Summary tab, you click the tab that has the configuration(s) you wish to edit. Then, to activate the edit mode, you click the EDIT button . Refer to the following example:

After completing your changes to the setting(s), click the SAVE button to update the job with the new configuration. Refer to the following example:

A banner displays across the top of the page informing you of a successful update to your configuration, as shown in the following example:

Which Settings Can Be Edited
As shown in the previous section, every tab and its settings in the edit workflow are the same as the corresponding configuration step in the create job workflow. All settings enabled for editing have a question-mark icon that you can hover your cursor over to display a tool tip with a short description of the field, as shown in the example below:

The following subsections describe the settings that you can edit on each tab and tell you the step in the create job workflow that corresponds to that tab.
The Job Details Tab
As shown in the previous section, the Job Details tab is the same as Step 1 in the create job workflow. Notice in the following example that you cannot change the OEM model or job type (in the Action field):

- OEM Model - the OEM model of the devices that will be targeted for this job. You cannot edit this field.
- Action - the type of job (which cannot be edited).
- Job Name - the name given to the job at the time of creation.
- Recurrence Type - the One-Time or Continuous option. Refer to the One-Time and Continuous Jobs section of this Command Center feature guide for information on these options.
- Number of Retries - the number of times to attempt to download this job if the first attempt is not successful.
- Delivery Type - the options that specify how the job should be executed. For System Push, when new devices that match the configurations in this job are added and online, the Ayla platform will push this Over-the-Air (OTA) update at the runtime of those new devices. The number of times this system push occurs depends on whether you configured the recurrence type for Continuous or One Time. For User Consent, the end-user must approve the delivery of this job when it is activated or the job is not pushed to the devices. You may also leverage the Cloud APIs or Mobile SDKs to obtain this user consent.
The OTA Attributes Tab
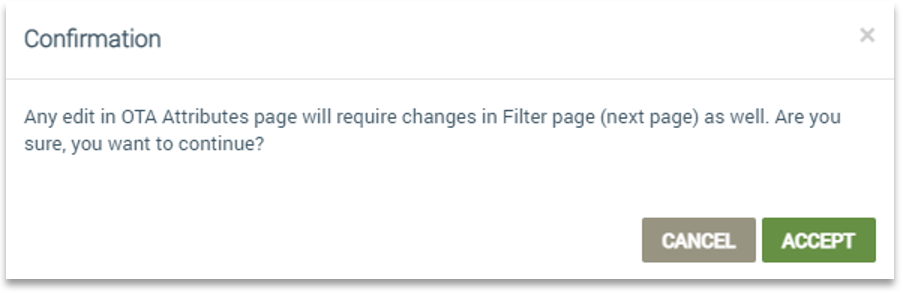
This tab corresponds to Step 2 in the create job workflow. OTA attributes are details on the host firmware image for the job, including information on the current version of the host firmware from which you are upgrading. When you click the OTA Attributes tab, a confirmation message displays informing you that changes made on this tab will require changes to the Filters tab as well.
Notice in the following example of the OTA Attributes tab in edit mode that you can only change the OTA image file and the current Host software version from which you are upgrading.

- OTA Image File - the OTA image file that is going to be used to upgrade devices in the field.
- Image Size - the size of the OTA image file that you selected for the OTA Image File setting. You cannot edit this field.
- Current Host Software Version - the specific current version of the host firmware from which you are going to upgrade. Your choices are: Specific Version for which you enter the version of the component software that you want to upgrade from, or All Versions which specifies to upgrade all versions of the component software to the new version.
- Image Host Software Version - the version to which the host firmware will be upgraded when this image is applied. This value is configured during the image upload and creation.
The Filter Tab
This tab corresponds to Step 3 in the create job workflow. Refer to the Device Filters section of this Command Center features guide for information on configuring filters.

The Schedules Tab
This tab corresponds to Step 4 in the create job workflow. Refer to the Job Schedules section of this Command Center features guide for information on configuring schedules.