Specific-Component OTA Jobs
If you have devices with multiple components, you can use the Command Center to deliver and manage Over-the-Air (OTA) updates directly to a specific component (instead of updating the full host image) on small or large groups of these device types. This enables you to create, monitor, and modify all aspects of OTA jobs for the target set of devices.
This section of the Command Center features guide describes how you should use the step-by-step workflow in the Command Center to create Specific-Component OTA jobs.
Get Started by Uploading Firmware Images
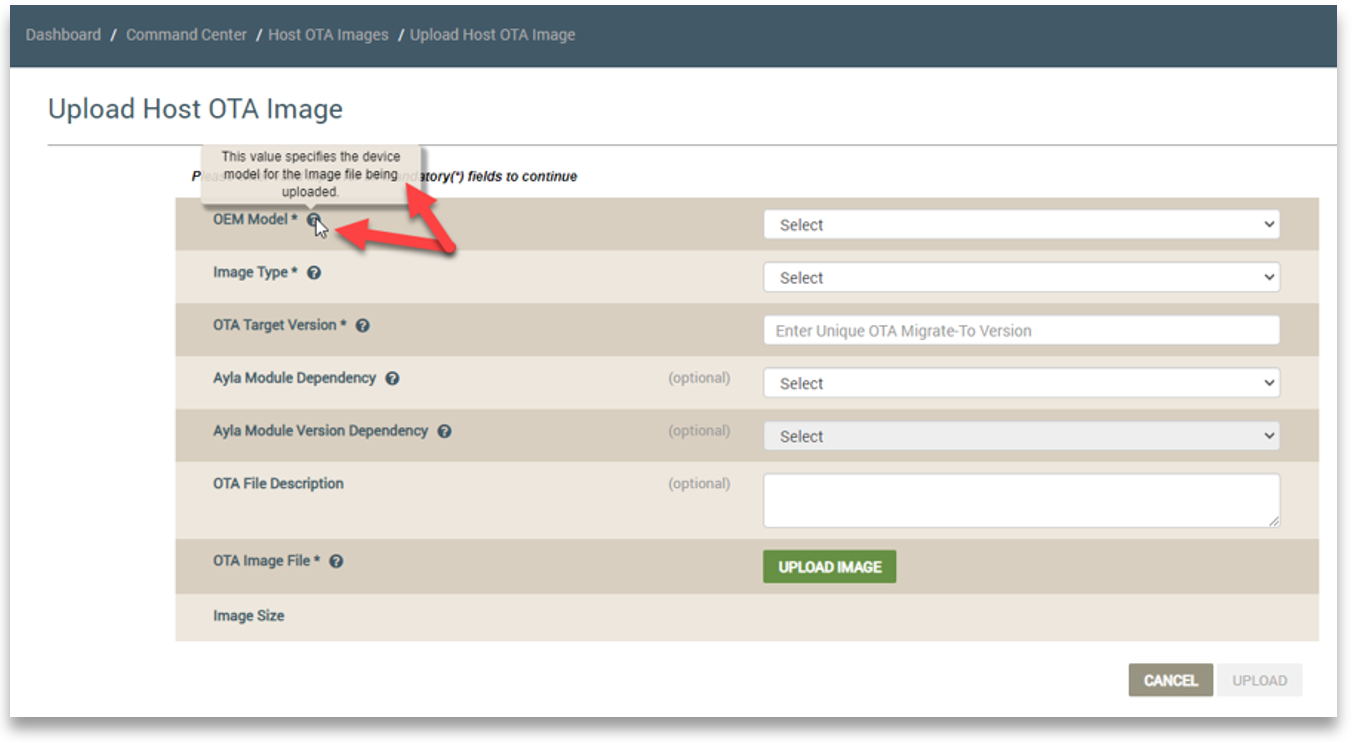
You first need to upload your firmware images for upgrades to the specific component of the devices. This is done from the Host OTA Images tab, using the UPLOAD NEW IMAGE button, as shown below:

When you click UPLOAD NEW IMAGE, the Upload Host OTA Image dialog box displays (shown below). You must complete all mandatory fields. There are tool tips for most fields. Hover your cursor over the question mark icon to display the tool tip describing what should be entered in that field along with other pertinent information. Refer to the following example:
For Specific-Component OTA jobs, you must select Specific Component OTA Image in the Image Type field (which is done in the example below). This displays two new fields. The first field is called "Component Property Name to Validate for Target Version" (as highlighted in the example below). The information in this field is used to validate whether the OTA update is successful. Therefore, your host firmware must support updating specific components.
From the list, select the property that corresponds to the component that will be updated. This property contains the software version of the component (also described as the component image version of the component). Refer to the following example:

In the OTA Target Version field, you must provide the exact target version of the component's software, including any spaces, timestamps, etc. that were used in the version number. It is important to please note that the version entered in this field is that of the component's and not the version of the full device image (also called the host image). Refer to the following example:

The second new field that displays when Specific Component OTA Image is selected is called "Label." This option enables you to include additional image identifiers to be used by the device when processing the OTA update. Refer to the following example; notice that this new field is optional and allows a maximum of 32 characters.

After clicking UPLOAD to complete the process of adding your component firmware image to the Ayla Platform, the following success banner should display across the top of the Host OTA Images tab and your image information is added to the list on this tab. Refer to the following example:

Configure Your Specific-Component Job
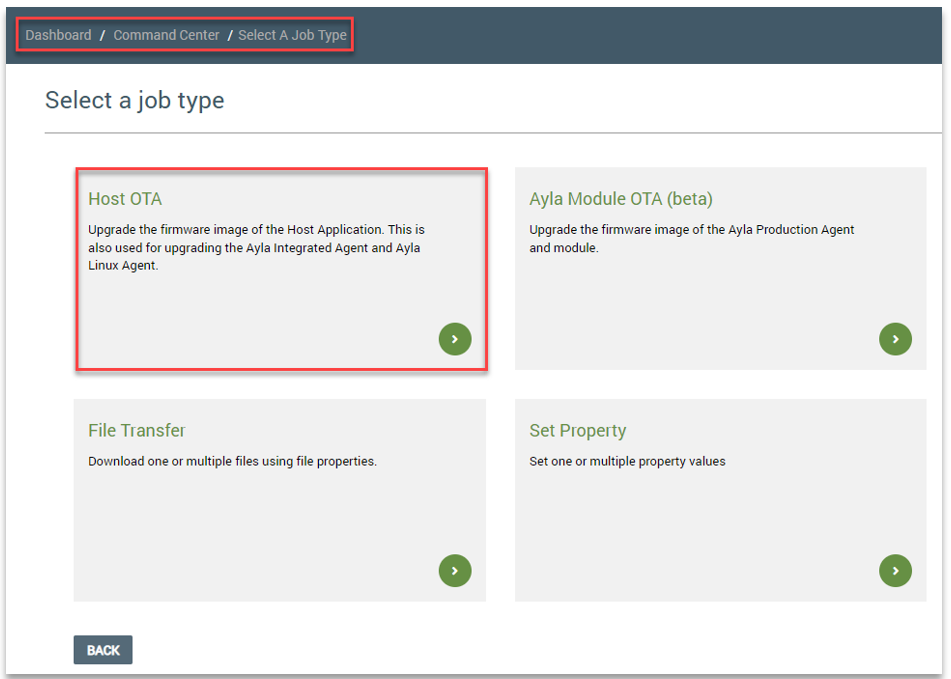
Like all job types, Specific-Component OTA jobs are created from the Jobs tab in the Command Center. When you click Command Center in the left navigation panel of the Ayla Customer Dashboard, the Job tab displays. To configure a job, you click the CREATE DEVICE JOB button. Refer to the following example:

The Command Center provides a step-by-step user interface for creating device jobs. To start your configuration, you must select your job type (as shown below). Your selection displays across the top of the dashboard while you complete the configuration steps (also shown below). For Specific-Component OTA jobs, you select the Host OTA job type. Refer to the following example:
Once you have selected your job type, the tabs define the remaining sequence of configuration steps (shown below) similar to a PC wizard or software setup assistant. As in other areas of the dashboard, there are tool tips for most fields. Hover your cursor over the question mark icon to display the tool tip describing what should be entered in that field along with other pertinent information. Refer to the following example:

For Step 1 (Enter Job Details), if you choose User Consent as the Delivery Type (shown below), the end-user must approve the delivery of this OTA job when it is activated, or the job is not pushed to the devices. The end-users can leverage the Cloud APIs or Mobile Software Development Kits (SDKs) to obtain this user consent; click here for the Cloud API Reference.

For Step 2 (Select OTA Image), make sure you select the correct version and property name for the component you wish to update. The images for Specific-Component device upgrades include the corresponding component's property name in parenthesis. Refer to the following example:

In Step 2, you can click the SEE MORE button to view additional information for the selected OTA image file. The full view is shown in the example below:

In Step 3 (Set Filter), you may refer to the tool tip for a description of each filter (as shown in the example below), or for additional information on filters, click here for the Device Filters section of the Command Center guide.

After configuring your filter option or selecting None for no filter, you can click the REFRESH button to find out approximately how many devices will be included in this upgrade. Refer to the following example:

In Step 3, you can also click the PREVIEW FILTER QUERY RESULTS button (shown in example above) to view your filter settings and the devices that will be included in the job. The dialog box that displays is called Filter Preview; refer to the example below. In Filter Preview, you can click a Device Serial Number (DSN) to open the Devices area of the dashboard for the selected device. This enables you to review all information about the device (settings, statuses, etc.). The example below also highlights the list of DSNs; each is a link.

When you continue to Step 4 (Set a Schedule), your Specific-Component OTA job is automatically saved, and the following success message displays across the top of the page:

In Step 4, you can set a schedule for your Specific-Component OTA job, or select the option to configure it later. Once you click SAVE, your job is added to the Jobs tab, as shown below. Notice in the example that you can also start your job anytime from the Jobs tab.

If you wish to configure a schedule for your job at a later date, click the job in the table listing on the Jobs tab to open the Job Summary, Details, and other configurations. Then, click the Schedule tab to set the schedule for the job. Refer to the following example:

After configuring the schedule, the following success message displays across the top of the page.

Updated 9 months ago